- Blogs
- A Comprehensive UK Guide to Summer House Insulation: Materials, Best Practices, and Regulations
A Comprehensive UK Guide to Summer House Insulation: Materials, Best Practices, and Regulations

TLDR
Why Insulate? To transform your summer house from a seasonal shed into a comfortable, year-round space for a home office, gym, or studio. Proper insulation protects the timber structure from damp and rot, making it a sound investment.
Key Materials: The most common choices are rigid PIR insulation boards (like Celotex/Kingspan) for high thermal performance in a slim profile; mineral wool (Rockwool/glass wool) for excellent soundproofing; multifoil insulation for space-saving; and sheep's wool for its natural, moisture-regulating properties.
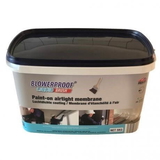
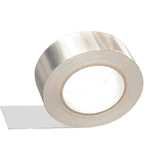
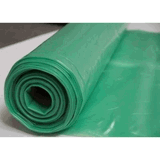
Moisture is Critical: To prevent condensation and rot inside the structure, you must install a Vapour Control Layer (VCL) on the warm (interior) side of the insulation. This is not optional if you plan to heat the space. All joints and edges must be sealed with appropriate tape to create an airtight barrier.
The Full Envelope: For insulation to be effective, you must treat the floor, walls, and roof as a continuous, unbroken thermal envelope. Don't forget high-quality, double-glazed windows and doors.
UK Regulations: Building Regulations do not normally apply to summer houses with an internal floor area under 15 square metres, as long as they are not used for sleeping. For buildings between 15 and 30 square metres, they must also be at least 1 metre from any boundary or built from non-combustible materials. Any electrical work must comply with Part P of the Building Regulations.
The Value of an Insulated Summer House
The traditional British summer house is evolving. Once a simple retreat for sunny afternoons, these garden buildings are now increasingly being transformed into highly functional, year-round extensions of the home. The demand for insulated garden offices, home gyms, art studios, and workshops has highlighted the necessity of high-performance insulation.1 Properly insulating your summer house is the single most important step in unlocking its full potential, turning a seasonal structure into a valuable, comfortable, and durable asset.
Creating a Year-Round Garden Retreat
The primary benefit of insulation is comprehensive temperature regulation. An uninsulated timber building will be cold and damp through the autumn and winter months, and can become uncomfortably hot during a summer heatwave, rendering it unusable for large parts of the year.
Effective insulation creates a stable indoor environment. It works by slowing the transfer of heat, keeping the warmth generated by a small heater inside during the winter, and reflecting the sun's intense heat away during the summer. This stability transforms the building into a true four-season space, perfectly suited for a home office where concentration is needed, a gym that's comfortable for a morning workout in January, or a creative studio that can be used whenever inspiration strikes.
Protecting Your Investment: Moisture and Structural Integrity
Beyond comfort, insulation plays a vital role in protecting the structural integrity of your summer house. Timber, the primary material for most garden buildings, is vulnerable to moisture. Daily activities within a heated space, such as breathing, making a cup of tea, or using electronic equipment, release water vapour into the air.
In an uninsulated or poorly insulated building, this warm, moist air comes into contact with cold surfaces—the walls, windows, and roof—where it cools and condenses into liquid water. This condensation can lead to damp patches, mould growth, and, over time, the rot and decay of the timber frame.
A correctly designed insulation system, complete with moisture-managing layers, prevents this condensation from occurring within the building's structure. This not only creates a healthier indoor environment free from mould but also safeguards your investment by ensuring the building's longevity.
Enhancing Comfort and Energy Efficiency 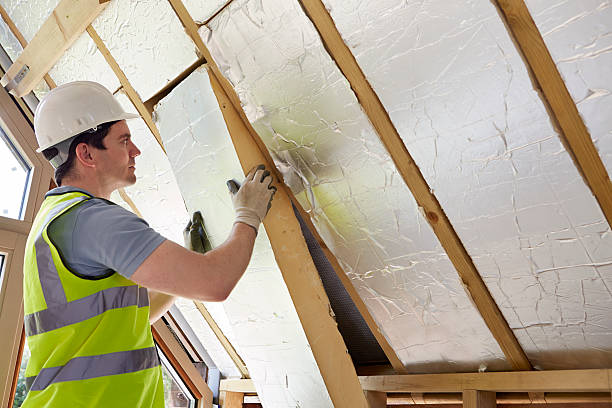
An insulated summer house is a more efficient one. By retaining heat effectively, the building requires significantly less energy to maintain a comfortable temperature. This means a small, low-wattage electric heater can be sufficient, leading to lower energy bills compared to the cost of attempting to heat a draughty, uninsulated space.
A secondary but significant benefit is acoustic insulation. Many insulation materials are excellent at absorbing sound, which can be a major advantage. It reduces noise from neighbours, traffic, or weather, creating a quieter and more peaceful environment inside. This is particularly valuable for a home office where focus is key, or for a music or hobby room where you want to contain sound within the building.
Core Principles of Summer House Insulation
Before cutting a single piece of insulation, it is important to understand the basic principles that govern how it works. A successful project depends on getting these fundamentals right. Simply placing insulation material into a cavity is not enough; it must be part of a considered system that manages heat, air, and moisture.
The Building Envelope Concept
Effective insulation requires thinking of the summer house's floor, walls, and roof as a single, continuous barrier known as the 'building envelope' or 'thermal envelope'. The goal is to wrap the entire structure in an unbroken layer of insulation.
Any gaps or interruptions in this envelope create what are known as 'thermal bridges'. These are paths of least resistance for heat to escape, typically through materials that are poor insulators, like timber studs, floor joists, or the frames of windows and doors.9 Thermal bridges reduce the overall effectiveness of the insulation and can lead to cold spots on the internal surfaces, which in turn can become problem areas for condensation.10 To prevent this, it is vital to ensure insulation is fitted snugly and that any joints or gaps are carefully sealed with expanding foam or specialised tape.
Managing Moisture: Vapour Control Layers (VCLs) and Breathable Membranes
Managing moisture is arguably the most critical and misunderstood aspect of insulating a timber-frame building. Water can damage a timber structure, so controlling it is paramount. This is achieved using two distinct types of membranes that perform different, but complementary, jobs.
The confusion often seen in online forums about whether these layers are necessary for a "shed" stems from a misunderstanding of the building's intended use.13 For a simple, unheated storage shed, moisture control is less of a concern. However, the moment you decide to heat and occupy a summer house regularly, turning it into a home office or living space, it begins to function like a small house. It will contain warm, humid air generated by people and activities. This creates a powerful pressure that drives moisture outwards, and if not controlled, this moisture will become trapped in the building's structure. For any heated garden building, the following layers are not optional; they are fundamental to its long-term health.
Vapour Control Layer (VCL)
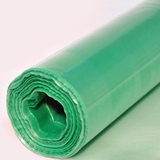
A Vapour Control Layer (VCL), sometimes called a vapour barrier, is an airtight and vapour-resistant sheet, typically made of polythene or foil. Its job is to stop warm, moist air from inside the room from passing into the cold structure of the walls or roof.
Placement: The VCL is always installed on the warm side of the insulation—that is, the interior side, just behind the internal plasterboard or cladding.
Function: It prevents interstitial condensation. Without a VCL, water vapour would travel through the insulation until it reaches a cold surface within the wall cavity, where it would cool to its 'dew point' and turn into liquid water. This trapped moisture leads directly to damp, mould, and rot.
Installation: For a VCL to work, it must be a continuous, unbroken barrier. All joints must be overlapped (by at least 150mm) and sealed with the correct tape. Any penetrations for electrical wires, sockets, or light fittings must also be meticulously sealed.
Breathable Membrane
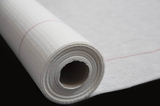
A breathable membrane, sometimes called a breather felt, is a water-resistant but vapour-permeable sheet.
Placement: This membrane is installed on the cold side of the insulation, between the insulation and the external timber cladding.
Function: It serves two purposes. First, it acts as a secondary weather barrier, stopping any liquid water (like wind-driven rain) that gets past the outer cladding from reaching the insulation and timber frame. Second, it is breathable, meaning it allows any water vapour that does find its way into the structure to escape safely to the outside. This ensures the structure can dry out.
Installation: It is typically stapled to the external side of the timber frame before the cladding is attached.
The Importance of Ventilation and Airflow
Making a building airtight with insulation and a VCL means that you must also introduce controlled ventilation. This is needed to manage humidity levels inside the room and maintain healthy air quality. For a small summer house, this can be as simple as installing trickle vents in the windows or a small wall-mounted extractor fan, particularly if it's used as a gym or will have multiple occupants.
Airflow is also important for certain types of insulation. Reflective multifoil insulation works by reflecting radiant heat across an air gap. For these products to be effective, a clear air gap of at least 25mm must be left on one or both sides of the foil. Without this gap, the foil cannot reflect heat and will simply conduct it, severely reducing its performance.
A Review of Insulation Materials for UK Summer Houses
Choosing the right insulation material depends on your budget, the intended use of the summer house, and how much internal space you are willing to sacrifice. Each of the main types available in the UK has distinct properties, advantages, and considerations.
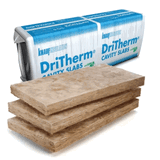
Rigid Foam Insulation Boards (PIR)
Commonly known by brand names like Celotex or Kingspan, Polyisocyanurate (PIR) boards are a very popular choice for insulating garden buildings.They are rigid foam panels, often with a foil facing on both sides.
Properties: PIR boards offer excellent thermal performance for their thickness, meaning you can achieve a high level of insulation without making the walls excessively deep. They are lightweight, easy to cut with a hand saw, and are resistant to moisture.
Application: Their slim profile makes them ideal for the floors, walls, and roofs of summer houses, where space is often at a premium. The foil facing can act as a built-in VCL, but only if all the joints between boards, and between the boards and the timber frame, are meticulously sealed with foil tape.
BUY POLYISOCYANURATE INSULATION
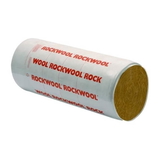
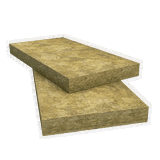
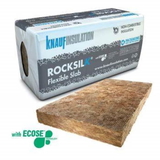
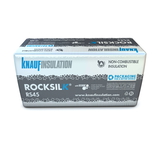
Mineral Wool Insulation (Glass & Rock Wool)
Mineral wool is a traditional fibrous insulation material that comes in rolls or semi-rigid slabs (batts).9 Rockwool is a specific type of mineral wool known for its density and rigidity.
Properties: Mineral wool provides good thermal insulation and has two other major benefits: it is naturally fire-resistant and offers exceptional acoustic performance, making it very effective at blocking noise. The material is flexible and is installed by simply pushing it into the cavities between timber studs, where it stays in place by friction. It is a breathable material, so a separate, dedicated VCL must be installed on the warm side.
Application: It is an excellent choice for walls and pitched roofs, especially if the summer house is to be used as a music room, workshop, or an office next to a noisy area.
BUY
Buy Summer House Insulation now
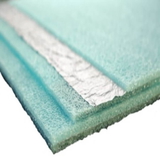
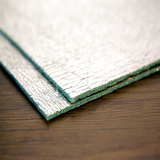
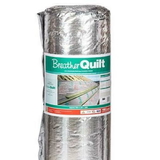

Multifoil Insulation
Multifoil insulation, such as products from EcoQuilt or SuperFOIL, is a modern solution made from multiple layers of reflective foil and insulating wadding.
Properties: This type of insulation works primarily by reflecting radiant heat. Its main advantage is that it is very thin and flexible, allowing you to achieve good thermal performance while taking up minimal space. Many multifoil products have an integrated VCL and are sold in convenient all-in-one kits for summer houses, which include the necessary tape and staple gun. A critical requirement is that they must be installed with an air gap on at least one side to work effectively.
Application: Multifoil is well-suited for retrofitting insulation into existing buildings or any project where preserving every centimetre of internal space is the top priority.
Natural Sheep's Wool Insulation 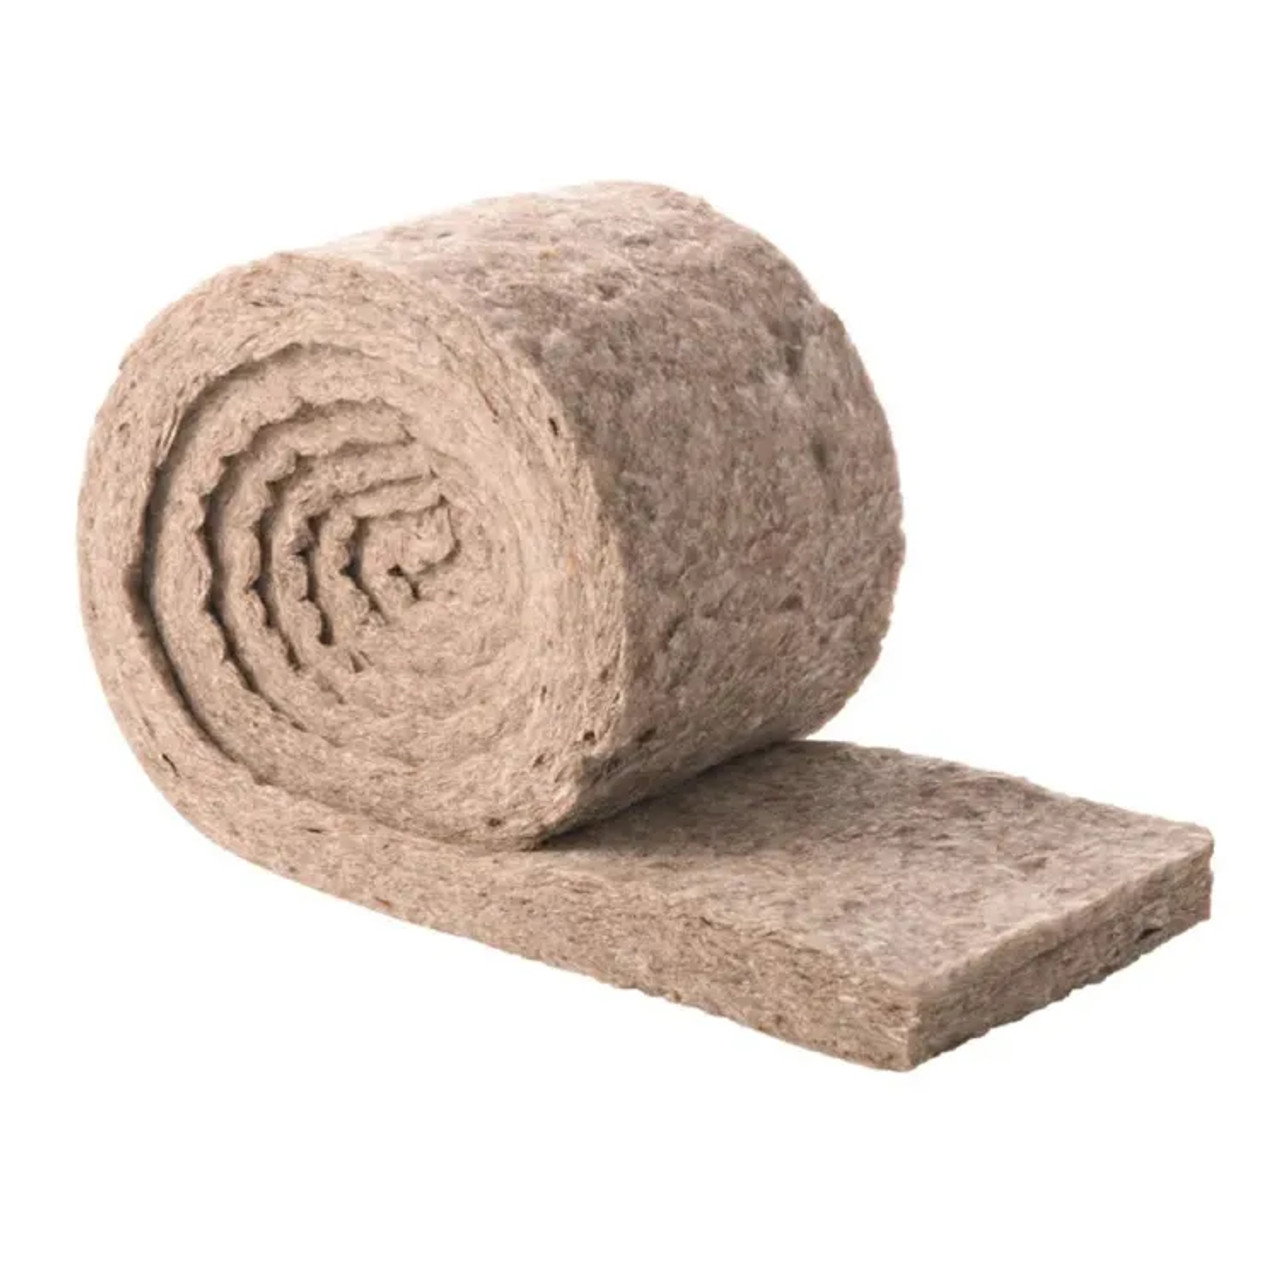
For those prioritising sustainability and a healthy indoor environment, sheep's wool is a premium, natural alternative.
Properties: Sheep's wool offers excellent thermal and acoustic insulation performance, comparable to mineral wool.8 Its unique and most significant advantage is its natural breathability and ability to buffer moisture. The wool fibres can absorb and release large amounts of water vapour from the air without feeling damp or losing their insulating properties. This helps to regulate humidity and protect the surrounding timber structure. It is a renewable resource, non-irritant to handle, and naturally fire-retardant.
Application: It can be used in walls, floors, and roofs just like mineral wool. It is the material of choice for eco-conscious projects or for individuals who are sensitive to synthetic materials.
Table: Comparative Analysis of Summer House Insulation Materials
To help with the decision-making process, the table below provides an at-a-glance comparison of the most common insulation materials.
Material |
Type |
Typical Application |
Key Advantage |
Considerations |
DIY Friendliness |
| PIR Boards | Rigid Foam | Floors, Walls, Roof | High thermal performance for its thickness. | Foil facing can be a VCL, but requires meticulous taping. Must be cut precisely. | Easy to cut and fit, but generates dust. |
| Mineral Wool | Fibre | Walls, Roof | Excellent acoustic insulation and fire resistance. | Requires a separate Vapour Control Layer (VCL). Can be an irritant to skin/lungs. | Easy to friction-fit, but requires protective gear (mask, gloves, goggles). |
| Multifoil | Reflective Foil | Floors, Walls, Roof | Very thin, saving internal space. Often sold in kits. | Requires an air gap to function correctly. | Very easy and clean to handle and install with a staple gun. |
| Sheep's Wool | Natural Fibre | Walls, Roof, Floors | Sustainable. Excellent moisture regulation (buffering). | Higher initial cost than synthetic options. Requires a separate VCL. | Very safe and pleasant to handle, non-irritant. Easy to tear or cut. |
A Practical Guide to Insulating Your Summer House
This guide provides a step-by-step process for insulating a typical timber-framed summer house from the inside. It assumes a basic level of DIY competence. Always wear appropriate personal protective equipment (PPE), such as gloves, eye protection, and a dust mask, especially when cutting insulation materials.
Preparation: The First and Most Important Step
Before installing any insulation, you must ensure the building's exterior is completely watertight. A leaky structure will trap water behind the insulation, leading to serious damage.
Inspect and Seal: Thoroughly inspect the entire exterior. Look for any gaps between timber cladding boards, around window and door frames, and at the corners of the building.
Apply Sealant: Use a high-quality, exterior-grade, flexible sealant or caulk to fill every gap and crack you find. This first step is crucial for preventing draughts and water ingress.
Step-by-Step: Insulating a Suspended Timber Floor
Most summer houses have a suspended timber floor, which consists of floorboards laid over joists. This can be insulated either from above (before the floorboards are fitted) or from below (if there is sufficient crawl space).
Prepare the Area: If working from above, ensure the area between the joists is clean and clear of debris.
Measure and Cut Insulation: Measure the distance between the floor joists. Cut your chosen insulation—PIR boards are an excellent choice for floors due to their rigidity and moisture resistance—to fit snugly in the gaps.
Install the Insulation: Fit the cut boards between the joists. If working from above, they can rest on battens fixed to the sides of the joists. If working from below, they can be pushed up and held in place with netting stapled to the underside of the joists.
Seal All Gaps: Use expanding foam or foil tape to seal the perimeter of each insulation board where it meets the joists. This prevents air movement (draughts) under the floor, which would reduce the insulation's effectiveness.
Lay the Vapour Control Layer (if required): If your insulation does not have an integrated foil facing, or if you are using a breathable material like wool, you should lay a continuous sheet of VCL over the top of the joists before the final flooring is installed.
Fit the Floorboards: Secure your final floor covering, such as plywood or tongue-and-groove boards, over the insulated joists.
Step-by-Step: Insulating Timber-Framed Walls
This process involves filling the cavities between the vertical timber studs that make up the walls.
Install a Breather Membrane (Recommended): Although this is best done from the outside before the cladding is fixed, if you are retrofitting, you can staple a breathable membrane to the inside of the external cladding, fitting it within each stud bay. This adds an extra layer of weather protection.
Cut Insulation to Fit: Carefully measure the width between the wall studs. Cut your chosen insulation (PIR, mineral wool, or sheep's wool) for a tight friction fit. The insulation should hold itself in place without any gaps at the edges.5
Install the Vapour Control Layer (VCL): This is a critical stage. Starting at one corner, staple a continuous sheet of VCL membrane over the entire internal face of the insulated wall frame. Ensure you have large overlaps (at least 150mm) at all joints and use the correct jointing tape to seal them completely. The goal is to create one single, unbroken, airtight sheet covering the whole wall.7 If using foil-faced PIR boards, you must use foil tape to seal every joint between boards and where the boards meet the timber studs and floor/ceiling plates to create the VCL.
Consider a Service Cavity (Best Practice): To avoid puncturing your carefully sealed VCL when fitting sockets and switches, it is good practice to fix vertical timber battens (e.g., 25mm deep) over the VCL, screwing them into the studs behind. This creates a small gap where you can run electrical cables without compromising the airtightness of the VCL.
Fit the Internal Lining: Screw your chosen internal wall boards, such as plywood, plasterboard, or decorative timber cladding, to the studs (or to the service battens if you added them).
Step-by-Step: Insulating a Pitched Roof from the Inside
Insulating a roof from the inside is known as creating a 'cold roof', because the roof structure itself remains cold. It is vital to manage ventilation in this setup to prevent condensation in the roof space.
Ensure Cross-Ventilation: A continuous, ventilated air gap of at least 50mm must be maintained between the top of the insulation and the underside of the roof deck or roofing felt.19 This allows air to flow from the eaves on one side to the other, carrying away any moisture that might accumulate. You can ensure this gap by not pushing the insulation all the way up against the roof deck.
Install Insulation Between Rafters: Cut your insulation (PIR boards or wool batts are common) to fit snugly between the roof rafters, ensuring you leave the 50mm air gap above.
Install the Vapour Control Layer (VCL): Just as with the walls, staple a continuous VCL membrane across the underside of the rafters. Ensure all joints are overlapped and securely taped to form a complete barrier that is continuous with the VCL on the walls.
Fit the Ceiling: Fix your internal ceiling finish, such as plasterboard or timber cladding, to the underside of the rafters.
Finishing Touches: Doors and Windows
Even a perfectly insulated structure will feel cold and draughty if the windows and doors are of poor quality. To complete the thermal envelope, it is essential to invest in double-glazed windows and a well-fitting, insulated door. Ensure any gaps around the frames are sealed with expanding foam and finished with sealant.6
Navigating UK Building Regulations and Planning Permission 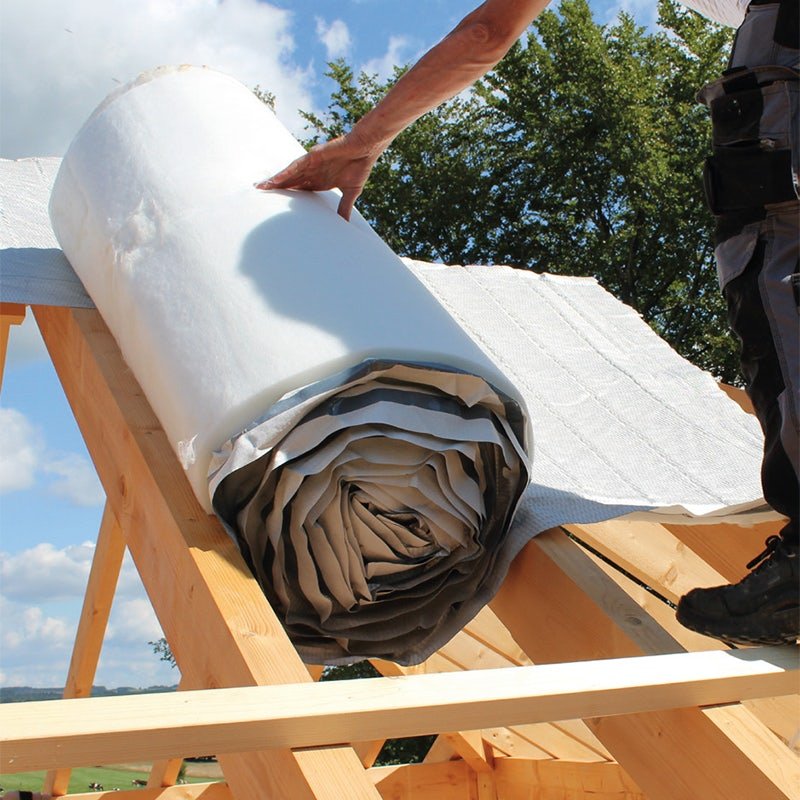
When building or modifying a summer house in the UK, it is important to be aware of the two main sets of rules that may apply: Planning Permission and Building Regulations. These are often confused but serve very different purposes. This guidance applies to England; regulations in Wales, Scotland, and Northern Ireland may differ.
Distinguishing Building Regulations from Planning Permission
Planning Permission governs the development of land and buildings. It is concerned with whether you are allowed to build something, its size, its external appearance, and its impact on the surrounding area and neighbours.
Building Regulations set the standards for the design and construction of buildings to ensure they are safe, healthy, and energy-efficient. They are concerned with how a building is constructed, covering aspects like structural integrity, fire safety, ventilation, and insulation.
Planning Permission for Outbuildings
Most summer houses and other garden outbuildings fall under 'Permitted Development', which means they do not require a formal planning application, provided they meet a strict set of criteria.35 The key rules under Permitted Development rights for houses in England are:
Height: The building must be single-storey. The maximum overall height is 4 metres for a dual-pitched roof or 3 metres for any other roof type. Crucially, if the building is within 2 metres of a property boundary, the maximum height at any point cannot exceed 2.5 metres.
Location: The building cannot be sited on land forward of a wall forming the principal elevation of the original house.
Footprint: The total area of all sheds, extensions, and outbuildings must not cover more than 50% of the total area of the garden (not including the area of the original house).
Special Areas: Permitted Development rights are more restricted in areas like National Parks, Areas of Outstanding Natural Beauty (AONBs), and Conservation Areas. You must always check with your local planning authority if you live in such an area.
Building Regulations for Outbuildings: When Do They Apply?
Whether or not your summer house needs to comply with Building Regulations depends almost entirely on its size and its intended use.
The rules are as follows:
Internal Floor Area Under 15m²: A detached building with an internal floor area of less than 15 square metres is generally exempt from Building Regulations, provided it contains NO sleeping accommodation.
Internal Floor Area Between 15m² and 30m²: A detached building in this size range is also generally exempt, provided it contains NO sleeping accommodation AND meets one of the following two conditions:
It is positioned at least 1 metre from any boundary.
It is constructed "substantially of non-combustible materials". This is a critical point; if you want to build a timber summer house of this size closer than 1 metre to your boundary, it will likely need to comply with Building Regulations regarding fire safety.
Internal Floor Area Over 30m²: Any detached building with an internal floor area of more than 30 square metres will normally require Building Regulations approval.
Any Building with Sleeping Accommodation: Regardless of its size, if you intend to use the building for sleeping in (e.g., as a guest annexe), it will always require Building Regulations approval.
It is also important to note that Part P (Electrical Safety) of the Building Regulations applies to any electrical installation in an outbuilding, even if the building itself is exempt. This means any new wiring, sockets, or lights must be installed and certified by a qualified electrician or notified to your local authority's building control department.
Understanding Part L (Conservation of Fuel and Power)
Part L of the Building Regulations sets the standards for the energy performance of buildings, including insulation levels and airtightness.37 While small detached buildings with a floor area of less than 50 square metres are exempt from the specific energy efficiency requirements of Part L 39, this legal exemption does not mean it should be ignored.
The functional requirements of a modern, heated summer house mean that simply meeting the minimum legal standard for exemption is not sufficient to create a comfortable or durable space. A 14m² office built with no insulation is legally permissible but will be functionally useless in winter. Therefore, it is strongly recommended to treat the principles of Part L as a best-practice guide for any insulated garden building project. Adhering to its standards for insulation, airtightness, and ventilation is the best way to ensure you build a high-quality, comfortable, and efficient space that will last for many years.
Legal Disclaimer
The information provided in this article is for general guidance and informational purposes only. It does not constitute professional, legal, or specialist building advice and should not be relied upon as such. The content may not be relevant or appropriate for all circumstances and does not deal with every aspect of the topics with which it deals.
Before acting on any information contained herein, you should always consult an appropriately qualified expert, such as a chartered surveyor, structural engineer, architect, or certified tradesperson, for specific advice tailored to your individual project and circumstances. You should never attempt to carry out any activity which may put you or others at risk or which may cause damage to your or anyone else's property. Activities involving gas or electricity must only be carried out by qualified and registered professionals.
To the fullest extent permitted by the law of England and Wales, we accept no responsibility or liability for any loss, damage, or injury that may arise from your use of, or reliance on, the advice and information provided. While we endeavour to keep the information up to date and correct, we make no representations, warranties, or guarantees, whether express or implied, about the completeness, accuracy, reliability, or suitability of the content. Any reliance you place on such information is therefore strictly at your own risk.
We do not and cannot advise on specific planning permission or building regulation compliance. It is the sole responsibility of the property owner to verify all requirements with their local planning authority and building control body before commencing any work.

Samuel Hitch
Managing Director
Buy Insulation Online.
Leave A Reply
Your feedback is greatly appreciated, please comment on our content below. Your email address will not be published. Required fields are marked *