- Blogs
- The Ultimate Guide To Insulated Plasterboard
The Ultimate Guide To Insulated Plasterboard
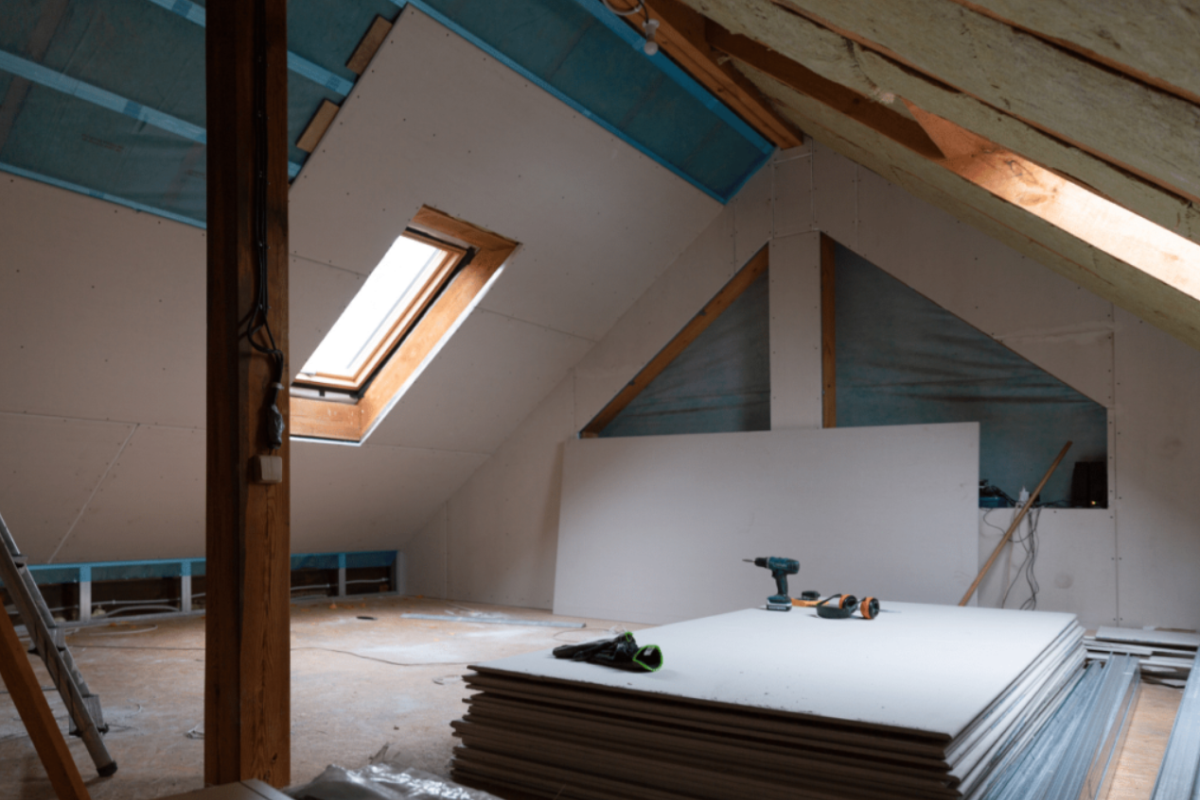


Insulated plasterboard is a convenient and cost-effective solution for achieving optimal insulation in your home. With the insulation built into the plasterboard, there is no need for an additional installation process, saving time and money.
One of the key benefits of insulated plasterboard is the option for foil-backed varieties, which serve as a built-in vapour barrier. However, it's important to keep in mind that ensuring the continuity of the vapour barrier at joints can be a challenge.
This type of plasterboard is a popular choice for new builds and renovation projects as it helps to improve the energy efficiency of a building and save on energy costs. Additionally, insulated plasterboard is a great option for homes with tight space restrictions and offers exceptional moisture resistance.
There are different types of insulation materials available, including foam-backed plasterboards like PIR, XPS and Phenolic. While fibreglass and mineral wool are also options, they are less common than foam-backed plasterboard. The type of insulation chosen will depend on the specific needs of the building and its environment.
Foam insulation is a great choice for buildings in colder, wetter environments as it offers a high level of thermal insulation and is resistant to humidity and moisture.
The price of insulated plasterboard is a lot less expensive than external wall insulation on a square meter basis. It is a great alternative for people who cannot afford to install EWS on their houses.
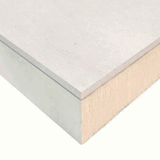
Insulated plasterboard
What exactly are insulating plasterboards?
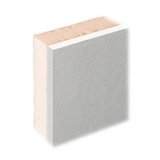
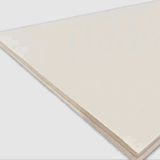
Insulating plasterboards are a type of construction material that combines insulation and plasterboard into one product. They typically consist of a layer of gypsum board that has been fused with a layer of insulation, such as polystyrene or PIR. These boards are typically 2.4 meters long and 1.2 meters wide, and they come in thicknesses of 12.5mm or 9.5mm plasterboard along with the thickness of the insulation as well.
Applications of plasterboard insulation.
- External wall insulation - To insulate external boundary walls.
- Internal wall insulation - To insulate partitions in between spaces and party walls.
- Ceiling Insulation - To insulate ceilings of rooms
- Room in roofs and dormers for use on joists and rafters.
- Any Other Applications where plasterboard can be used.
Why use insulation-backed plasterboard?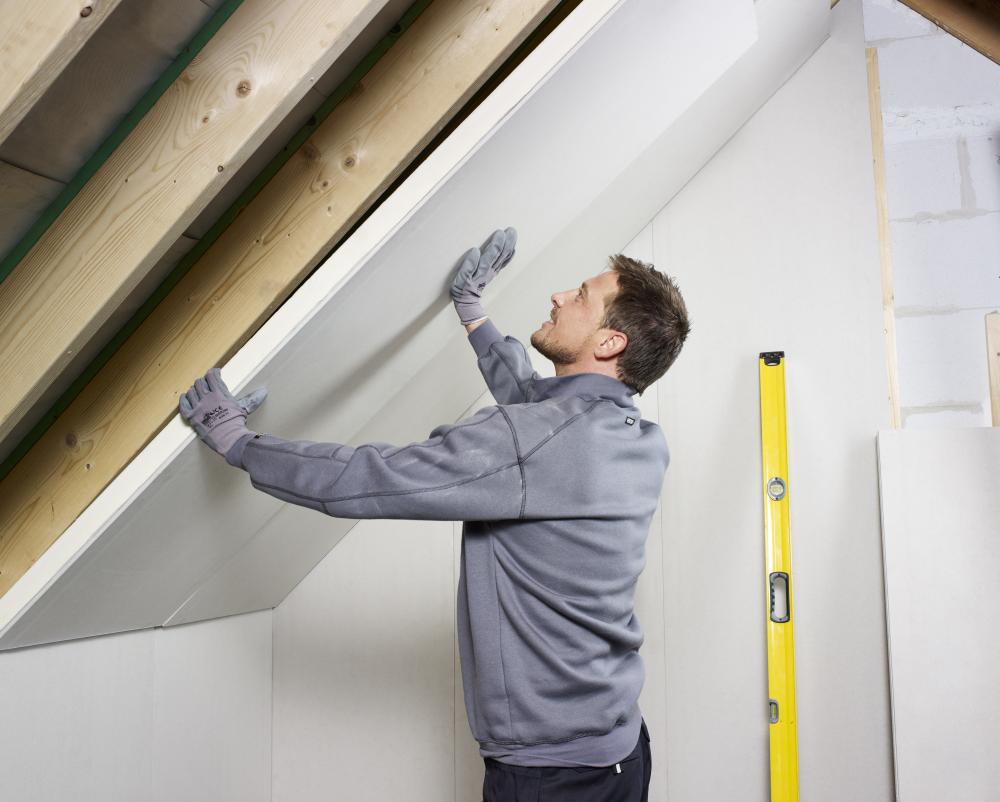
Thermal backed plasterboard offers lots of benefits over the standard two-part system of insulation board with plasterboard fitted individually.
Some advantages of installing insulated plasterboard include:
Thermal Backed Plasterboard Saves On Labour Installation Time.
One of the key advantages is the time saved during installation. Insulation-backed plasterboard eliminates the need for separate insulation installation, reducing the labour and time required for the project.
It is a cost-effective solution that can be easily installed onto the wall and removed if necessary too.
Seeing as labour usually represents the largest portion of the cost when it comes to construction projects, specifying insulated plasterboards could really drive down the cost of the job.
They lower energy costs
Among the primary advantages of insulated plasterboard is its capability to enhance the energy performance of a building.
Insulated plasterboards help to increase the energy efficiency of a building by providing an extra layer of insulation that helps to retain heat in the wintertime and remain cool in the summertime.
This can lead to considerable energy cost savings in time, in addition to a more comfortable working or living environment.
Insulated plasterboard is a cost-effective method to stop heat loss and reduce your heating expenses. Studies have revealed that walls can lose as much as 16% to 25% of heat.
Function as a vapour barrier.
A vapour barrier, also known as a moisture barrier, is a layer of material applied to the back of a plasterboard to prevent the passage of water vapour.
This barrier is typically made of a metalized foil and is applied to the insulation before being laminated to the plasterboard. The purpose of a vapour barrier is to reduce the chances of condensation forming within the wall cavity and causing damage to the structure.
Insulation-backed plasterboards have exceptional moisture resistance owing to the simple fact that the products themselves are normally closed cell (in the case of PIR and XPS) and the actual material themselves is a kind of vapour barrier as it does not permit moisture to travel through them easily. However, they are not totally waterproof so they still need a proper, vapour barrier laminated on them.
When you use foil-backed insulated plasterboard, you'll save even more time and money because the foil serves as a vapour barrier between moist air and any cavities behind your plasterboard / studwork.
It can be hard to make sure that the vapour barrier stays consistent and unbroken along the joints, so care needs to be taken by making sure that the plasterboards are butted up close together and sealed using a mastic along the perimeter and joints where applicable. Please note Knauf EPS thermal laminate does not have a vapour barrier integrated with it and it would require Knauf Laminate Vapour Check Board.
Types of Thermal PlasterBoards
Insulated plasterboards can be of various types depending upon the kind of insulating product. Here are some of the most common types and materials of insulated plasterboard you will find on the market in the UK.
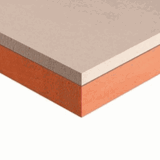
PIR Plasterboard
Polyisocyanurate or PIR Plasterboard is the most typical kind of insulating plasterboard. PIR is a type of foam rigid insulation that is made from polyisocyanurate, a closed-cell, thermoset plastic that is known for its excellent thermal insulation properties. They have an exceptionally low thermal conductivity of 0.022 W/mK.
Two of the most popular PIR insulated plasterboards are Celotex PL4000 and Xtratherm Thin-R Thermal Liner
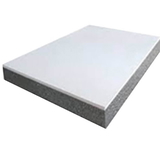
Polystyrene-backed plasterboards.
Plasterboard with polystyrene backing is exceptionally popular and there are 2 ranges, XPS thermal plasterboards and EPS polystyrene plasterboard
Here, polystyrene boards of differing densities are backed on a 9.5 mm plasterboard. You can learn more about EPS and XPS insulation in our blog What is the difference between EPS and XPS insulation?
Expanded Polystyrene Plasterboards (EPS)
Expanded Polystyrene (EPS) insulated plasterboards are another type of insulating plasterboards that is widely used in construction and building projects. EPS is a lightweight, closed-cell foam material that is made by expanding small beads of polystyrene. The beads are heated and expanded to create a foam material that is then shaped into various forms, such as blocks or sheets.
EPS insulated plasterboards are made by laminating a layer of EPS insulation to a layer of gypsum plasterboard. The result is a plasterboard that has insulation built-in, eliminating the need for a separate insulation installation process. EPS insulated plasterboards are known for their excellent thermal performance, high moisture resistance, and low thermal conductivity.
They also have high compressive strength and are dimensionally stable, which makes them ideal for use in walls, ceilings, and floors. EPS insulated plasterboards are also lightweight, easy to install, and can be cut and shaped to fit any space.
Finally, they are relatively cheap compared to PIR, XPS and Phenolic so are good for those on a budget. A top-rated EPS plasterboard is Knauf EPS Thermal Laminate
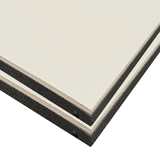
Extruded Polystyrene plasterboards. (XPS)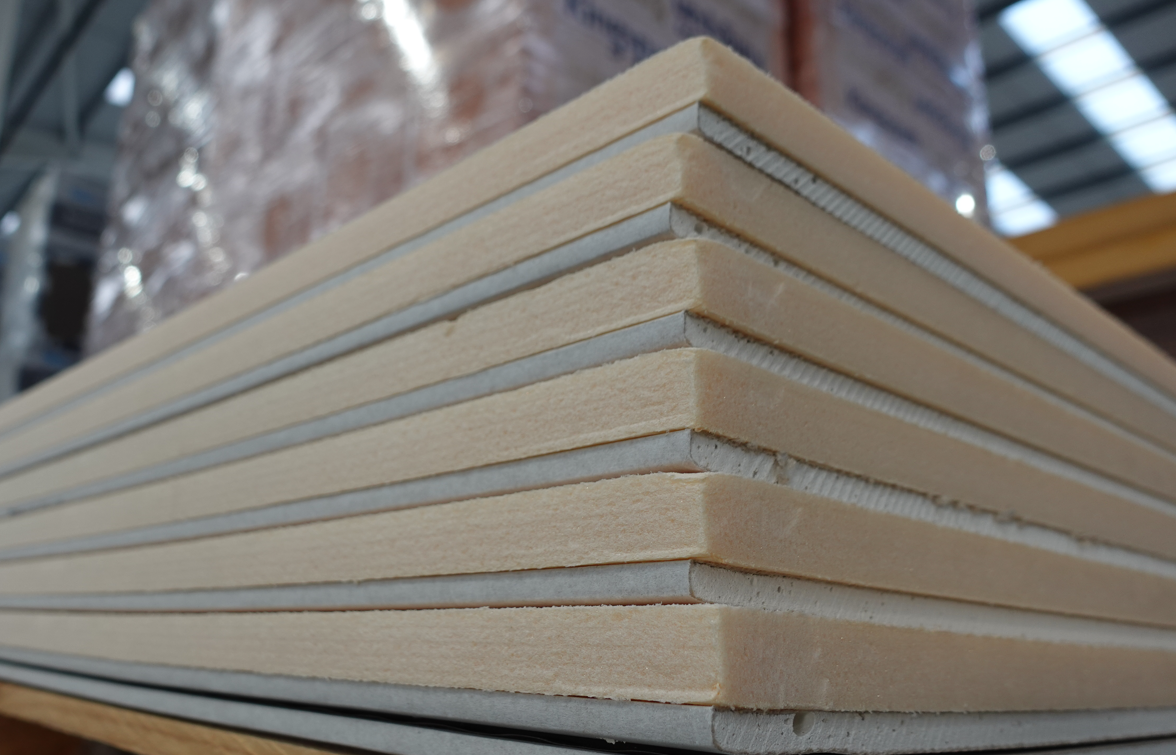
These insulated plasterboards integrate the insulation effectiveness and compressive strength of extruded polystyrene with the drylining applications of plasterboard.
Here the extruded polystyrene is backed on a 9.5 mm thick, tapered edge plasterboard. You can get 27mm thermal plasterboard by using Knauf XPS laminate plus, one of our most popular insulated plasterboards. XPS is the best insulation at resisting moisture so if moisture is a concern, go with XPS.
We believe that Knauf XPS laminate plus is the very best insulated plasterboard on the market, because it is cost effective and very efficient at its job, which is providing thermal insulation.
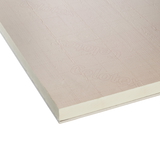
Phenolic Backed Plasterboard.
Phenolic backed plasterboard provides excellent thermal efficiency and fire resistance. It also offers a level of thermal insulation that is extraordinary for most insulation materials, offering a thermal conductivity of only 0.018 W/mK throughout all densities.
Phenolic insulated plaster boards can come as thin as 37.5mm in total.
This thin insulated plasterboard comprises a 25mm layer of phenolic foam with a layer of 12.5 mm plasterboard bonded to it.
How can you install thermal insulated plasterboard?
Insulated plasterboard can be fixed by using one of the below-mentioned techniques:
- Dab and dot approach using dollops of drywall adhesive on a brick wall. Have a look at our blog site which talks about this technique in more information here - How to Dot and Dab Insulated Plasterboard.
- Screwed to lumber battens which are themselves screwed to the wall.
- Screwed straight to the wall with wall plugs and screws, although it needs to be stated that screwing insulated plasterboards straight to the wall is not advised due to the opportunity of thermal bridging through the screws.
- Floating wall approach which includes constructing a stud wall far from the existing wall leaving an air space between the 2 walls.
- InstaStik foam is a type of adhesive foam that is used for insulation and construction purposes. It is typically packaged in a can, and is applied using a nozzle to dispense the foam. The foam is then used to fill gaps, seal openings, and insulate walls and ceilings. It's also used to adhere insulation to surfaces such as brick, metal or wood. It can be used in commercial and residential projects.
Dot and Dabbing Insulated Plasterboard
When insulating your walls using insulated plasterboard, there are two main options for installation: mechanical fixing or adhesive bonding. Mechanical fixing involves attaching the insulated plasterboard to wooden battens, which can be time-consuming and require more precise measurements to ensure a level and even finish.
Adhesive bonding, on the other hand, allows for more flexibility and can accommodate irregular surfaces by using different thicknesses of adhesive.
However, it is important to note that adhesive bonding is not suitable for all types of walls, such as those with a risk of moisture penetration or timber or steel frame construction. Additionally, when insulating walls that do not have a cavity, it is important to consider the potential risk of moisture penetration from the outside and to use mechanical fixing as a safer option.
 Tools needed for installing insulated plasterboard.
When carrying out plasterboard installation, it is essential to work in a well-ventilated area and to wear appropriate protective gear such as a dust mask and hand and eye protection.
A trowel and hawk, tape measure, hammer, saw, drill, and a straight edge are the necessary tools for the job. The trowel and hawk will be used to apply the adhesive, while the tape measure will assist in cutting the plasterboard to the correct length. The hammer will be used to tap in the nailable plugs, and the saw will be used to cut the boards to size. The drill, whether cordless or not, will be used to make holes for the nailable plugs. Lastly, the straight edge will be used to ensure the board is level and true.
The adhesive should be mixed and applied according to the manufacturer's instructions. To ensure proper alignment, the wall should be plumbed and allowances made for any high spots on the masonry.
How To Install Insulated Plasterboard Using Dot and Dab
Guidelines should be marked on the floor and ceiling to establish the new wall plane and on the wall at 1200mm centres to indicate the position of the boards. The installation should begin in an internal corner or around a window or door reveal.
A continuous bed of adhesive should be applied around the perimeter of the wall and around any services or openings, paying special attention to air tightness. The boards should be cut 15mm short of the floor-to-ceiling height and placed on packing strips, tapped into position and supported until the adhesive sets. Fixings should be applied at the midpoint of the board and around 25mm from the edge.
When installinginsulated plasterboard via dot and dab, it is important to note that there are differences between fixing standard plasterboards and thermal boards. Thermal boards require four rows of dabs and a continuous sealing of the perimeter and any window or door openings.
It is important to ensure that the dab centres are 300mm apart and that the bonding compound has had time to set and dry before installing any mechanical fixings.
Additionally, when installing nailable plugs, a rule of thumb is to use a length of 50mm plus the thickness of the board and to always go up to the next size when in between available lengths. The plugs should be placed 300mm down from the ceiling and 25mm in from the board edge, with two plugs per board, and drilled through to be knocked in place.
Installing Batten Wall Insulated Plasterboards
When it comes to mechanically attaching insulated plasterboard to wooden battens, the process can be slightly more challenging if the walls are uneven. In this case, it is necessary to pack out each baton to ensure that it is level and lined up correctly before attaching the plasterboard.
To do this, it is recommended to use treated timber battening or a proprietary metal wall liner system.
The first step is to measure and mark the walls to indicate the baton positions, including all wall edges, openings, and surfaces. Before fixing, it is important to attach 100 millimeter strips of DPC (damp-proof course) to the back of each timber baton.
The vertical patterns should be placed at a maximum of 600 millimeter centers, with horizontal battens at both the top and bottom, as well as around openings.
To fix the battens, drill through the timber and into the wall, securing them in place using wood screws and wall plugs or all-in-one hammer fittings. The battens can also be packed out to ensure a level surface.
The fixings should penetrate a minimum of 45 millimetres into the existing masonry, and be no more than 600 millimetres apart and 75 millimetres in from the end of each baton.
When attaching the insulated plasterboard, it is important to ensure that all adjoining boards are tightly abutted and meet the centre lines of each baton. All horizontal joints should be staggered if needed.
Secure the boards to the timber battens using screws at 300mm centres and 200mm centres around openings and external corners. The fixings should penetrate at least 25mm into the timber or 10mm into metal studding, and be no less than 10mm in from the edge of the board.
After attaching the insulated plasterboard, it is important to seal the gaps with PU expanding foam and then flexible sealant or an equivalent. Apply the sealant around any further joints and then either tape and joint the boards or skim the walls as appropriate. Once this is done, the wall is ready skimmed or tape and filled.
Another way to install insulated plasterboard is over battens. The steps to install it are:
It is important to follow the manufacturer's instructions for installation to ensure that the insulation is installed correctly and that the vapor barrier is continuous to prevent moisture from getting trapped in the wall cavity.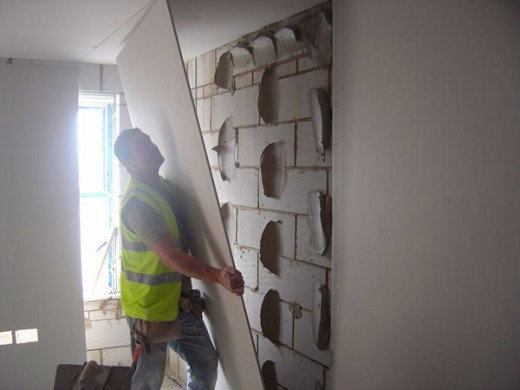
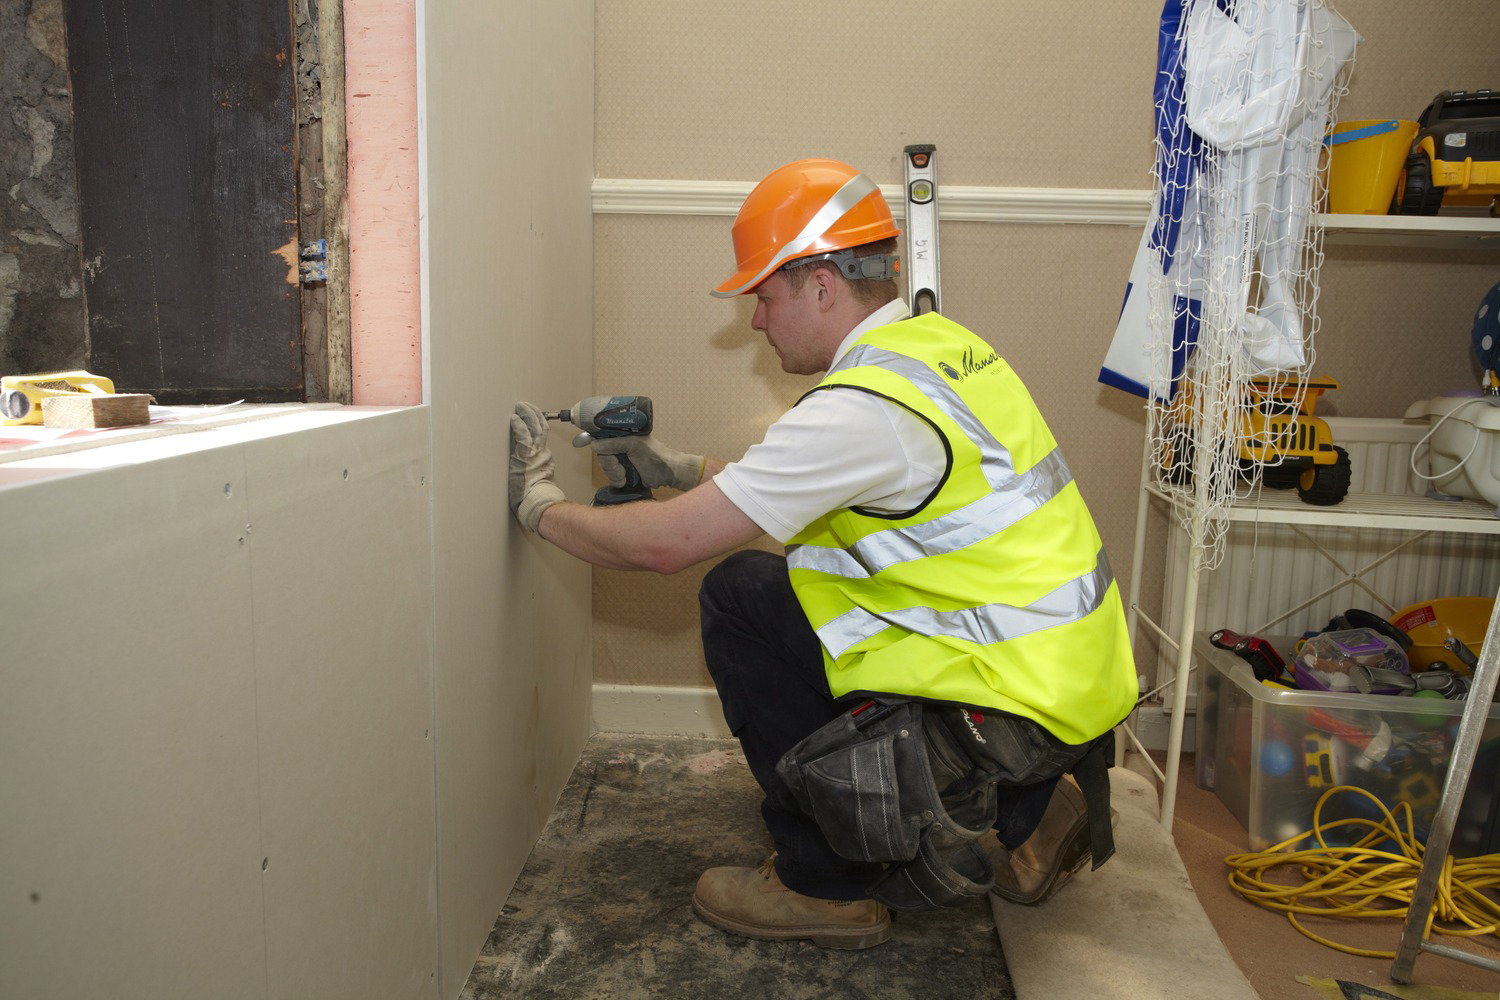
Screwing Insulated Plasterboard directly into walls
When it comes to attaching insulation to walls, there are different methods depending on the type of wall construction. One option is to use special screws that are inserted into wall plugs embedded in masonry walls. However, because metal conducts cold, there is a potential risk of "cold bridging" with this method, making it the least preferred option.
For houses with modern timber-frame construction, where the main walls comprise a timber-panelled inner leaf, the insulation boards can be screwed directly through the plasterboard into the existing timber stud work. But before doing so, it is important to provide a new vapour barrier over the existing wall as a precaution against moisture penetrating the timber inner leaf.
Things to think about prior to installing Insulated Plasterboard.
Radiators
When it comes to insulation projects, it's possible that you may need to remove and replace radiators. The first step is to turn off the flow of water through the radiator.
To do this, locate the metal cap on the left side of the radiator and turn it off with an Allen key. On the right side, screw down the grey part of the valve and then turn the thermostat valve to zero. After that, unscrew the connection between the radiator and the valve, placing a container underneath to catch any water that may come out. Make sure to have multiple containers ready for this step.
Sockets and Switches
Another aspect to consider when insulating an internal wall is the location of sockets. If they are on the outer wall, they will need to be moved inwards to accommodate the additional depth of the insulated plasterboard. There are a couple of ways to do this. If there is slack in the cable, it may be possible to pull it through. Alternatively, you can move the socket upwards or downwards, depending on where the cables come from, to give you the necessary slack for the wires to reach the new inner side of the wall.
Skirting and Window Ledges
Next, you will need to remove the skirting and the window board, which is not deep enough to accommodate the insulated plasterboard. You'll need to install a new one. The last step is to cut the skirting on the walls adjacent to the outer wall. By cutting the insulated plasterboard to the shape of the skirting, you can minimize thermal bridging back to the radiator pipes.
Humidity Levels and Vapour Barries
When it comes to insulating the walls inside of a home, one of the major concerns is the potential for condensation. Without insulation, the brick walls are relatively warm because they are in contact with the warm air inside the house.
However, when insulation is added, it can make the inside of the brick walls colder and if humidity or moisture is present, it can lead to condensation.
This condensation can cause water droplets to form behind the walls and potentially cause black mould along with damage to the structure of the house.
When it comes to preventing condensation, it is important to both heat the space and ensures proper ventilation. Condensation tends to form in the coldest areas of a room, such as corners.
To avoid this issue, it is important to make sure that the insulation is installed properly and that a vapour barrier is in place to slow the movement of moisture through the insulation. Additionally, it is important to monitor the humidity levels inside the house and take steps to reduce them if necessary.
Is the wall damp?
Whilst on the subject of moisture, if you are planning to insulate a damp wall to hide the dam, you should think again. This dampness might permeate through the adhesive and insulated plasterboard too.
It is i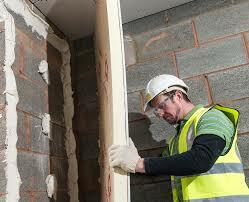 mportant to note that insulated plasterboard should not be used as a means of hiding dampness. As it is a gypsum-based product, using it in continuously damp or humid conditions can lead to the plasterboard itself soaking up the moisture, leading to failure
Additionally, it should not be used in areas where there is a risk of moisture penetration through the substructure or external walls, and proper seals should be in place at the perimeter to prevent gaps.
It is advised you treat the source of dampness first or sometimes it is acceptable to put up a floating wall away from a damp prone wall, however you will lose a lot more area by doing this.
You will lose floor space
Since they will end up being thicker, you will lose flooring area by lining your walls. It will not be obvious in many places, yet it is noticeable in small areas like cloakrooms and small bathrooms. You will really only lose around 65mm of area by using insulating plasterboard.
Hanging heavy components
When working with insulated plasterboard, especially those that are bonded directly to the wall using methods such as dot and dab, it can be challenging to attach other fixtures or items to the wall. This is because the plasterboard is soft and does not provide enough support to hold significant weight.
It will be necessary to prepare thoroughly for relocating large fixtures around the house and remounting them carefully in order to get enough support.
For stud walls, thick lumber battens and noggins can be strategically placed to line up with install points prior to the insulated plasterboard being installed
On masonry walls, screw all the way through to the underlying brick.
Another solution to this problem is to use specialized fixings designed specifically for use with dot and dab plasterboard, such as Corefix. These fixings offer additional support to the screw beyond the wall, allowing for heavier objects to be securely attached to the wall.
?Another option is to cut out a section of the plasterboard and install a wooden batten for added support. This way you can have a sturdy point to attach the desired object.
Thermal Plasterboard FAQ's
What fixings do I need for insulated plasterboard?
You can use basic drylining screws for insulated plasterboard onto stud work, although if you are screwing straight into masonry walls you may wish to use something like Insofast screws which assist avoid thermal bridging. For dot and dab, you can use any sort of plasterboard adhesive.
Can you overboard existing plasterboard walls and ceilings with insulated plasterboards?
It is common practice to overboard walls and ceilings. Prior to using insulated plasterboard for ceilings, you need to find the ceiling joists.
In many UK homes, they are spaced at 600mm or 400mm centers and run along the shortest side. In order to locate wall studs, you will require a stud detector.
If the existing plasterboard has actually been dotted and dabbed, an expert contractor should be consulted as there may not be enough strength on the dabs to hold the weight of more plasterboard and insulation on top of what is already there.
Where Can I Buy Insulation Plasterboards?
You can purchase insulated plasterboards right here at Buy Insulation Online, nevertheless, they can be gotten from your local hardware shops such as B&Q, Wickes and Homebase.
We provide click collect for PIR insulated plasterboards, EPS and XPS insulated plasterboards with big name brand names such as Kingspan and Knauf.
If your trying to source insulated plasterboard for use on bigger projects, contact us to see if we can provide you with an even more affordable quote in bulk.
What are insulated plasterboard sizes?
The normal size for insulated plasterboards is 2400mm x 1200mm.
What is the basic insulated plasterboard thickness?
There is no standardised thickness, although 50mm insulated plasterboard is a popular search term although the real thickness of insulated plasterboard will be more like 62.5 mm, which is 50mm thermal insulation board and 12.5 mm drywall.
What thickness of insulated plasterboard should I use?
The thickness of insulated plasterboard required to meet building regulations in the UK depends on the type of insulation used and the U-value (a measure of thermal efficiency) required for the specific area of the building. The standard U-value for walls in the UK is 0.35 W/m²K or lower.
For example, if you are using expanded polystyrene insulation, you may need to use a thickness of 80-120 millimetres to achieve a U-value of 0.35 or lower. However, using a thicker layer of insulation or more efficient insulation material, such as PIR, may allow you to use a thinner layer of insulated plasterboard.
It is important to consult with a professional or check the manufacturer's guidelines to determine the appropriate thickness of the insulated plasterboard for your specific insulation and building requirements.
Do I need a vapour barrier with insulated plasterboard?
It depends on the type of insulated plasterboard you are using and the specific requirements of the building regulations in your area. Some types of insulated plasterboards, such as those with foil-backed insulation, include a built-in vapour barrier. However, even if your insulated plasterboard includes a vapour barrier, it's important to ensure that it is properly installed and that continuity is maintained at joints and around openings.
Building Regs may require a separate vapour barrier in certain conditions, it is best to consult a professional or your local building officials to determine if a separate vapour barrier is necessary in your specific situation
 Is it worth using insulated plasterboard?
Insulated plasterboard can be a worthwhile option for improving the energy efficiency of a building. It combines the functions of insulation and plasterboard into one product, eliminating the need for a separate insulation installation process.
Does insulated plasterboard cause damp?
Insulated plasterboard itself does not cause dampness. However, if it is installed in an area where there is already damp or moisture present, it can trap the moisture and lead to mould growth alongside transferring the dampness to the internal surface of the insulated plasterboard. It is also not advised to dot and dab insulated plasterboard direct onto a non cavity wall i.e solid brick wall.
It is important to properly address and fix any damp issues before installing insulated plasterboard. Additionally, it's important to ensure continuity of the vapour barrier at joints and use a DPM on any battens which are attached to the walls.
Also, XPS thermal boards are the best at resisting moisture so these should be used in conjunction with the above advice.
Can you fix Insulated Plasterboard to Existing Plastered Walls?
It is possible to fix insulated plasterboard to existing plastered walls, but it depends on the condition of the existing plaster and the type of insulation being used. If the existing plaster is in good condition, the insulated plasterboard can be fixed directly to it using appropriate fixings and adhesive.
However, if the existing plaster is cracked, flaking or in poor condition, it is not advisable to use the dot and dab method and therefore you would either have to remove all of the plaster back to brick so you can dot and dab or use a mechanical fixing method like battening.
In Conclusion:
Installing insulated plasterboard can save on labour installation time, and be a cost-effective solution to stop heat loss and reduce heating expenses.
However, it is important to make sure that it is installed correctly, and that any existing sockets or switches are moved or modified to accommodate the additional depth of the insulated plasterboard. It is not recommended to fix the insulated plasterboard to existing plastered walls without proper preparation and consultation with a professional.

Samuel Hitch
Managing Director
Buy Insulation Online.
Leave A Reply
Your feedback is greatly appreciated, please comment on our content below. Your email address will not be published. Required fields are marked *