- Blogs
- Installing Loft Boards: A Comprehensive Guide to Placing Flooring on Joists and Future Removal (UK Standards and Regulations)
Installing Loft Boards: A Comprehensive Guide to Placing Flooring on Joists and Future Removal (UK Standards and Regulations)


TLDR: Key Compliance Summary
Installing loft flooring for storage in the UK requires adherence to strict building compliance, primarily focused on thermal efficiency and ventilation. The modern recommended insulation depth is 270mm of mineral wool. It is crucial to use a specialised raised flooring system (such as proprietary legs) to prevent the compression of insulation, which would otherwise compromise its performance and lead to damp. This system must also preserve a minimum 50mm airflow gap above the insulation. Structural integrity (Part A) must be considered, as standard ceiling joists are rarely designed to support significant storage weight. Professional consultation before loading the loft space is highly recommended.
Section 1: Regulatory Foundations: Structure, Thermal Performance, and Moisture Control
1.1 Defining the Project Scope: Storage Floor versus Habitable Space
When preparing to board a loft space, it is essential for the homeowner to first establish the intended use of the area, as this dictates the necessary regulatory approvals. Loft boarding designed purely for simple, light storage is often treated as a minor alteration. However, any substantial alterations intended to make the space more accessible or usable—such as installing a fixed staircase, lining the walls, or significantly improving the area—will likely cross the threshold into requiring full Building Regulation approval.
If the work constitutes a loft conversion, even if the owner only uses it for temporary storage, consent from the local council or borough authority is mandatory. This consent ensures compliance with several critical parts of the Approved Documents, including Part A (Structure), Part B (Fire safety), Part F (Ventilation), and Part L1B (Thermal insulation). A failure to secure the required compliance means the space cannot legally be marketed as a habitable room when the property is eventually sold. The regulatory requirements become extensive when the project transitions from simple storage to alterations that increase the accessibility and usability of the space to a degree resembling a living area.
1.2 Structural Integrity and Load Bearing (Part A)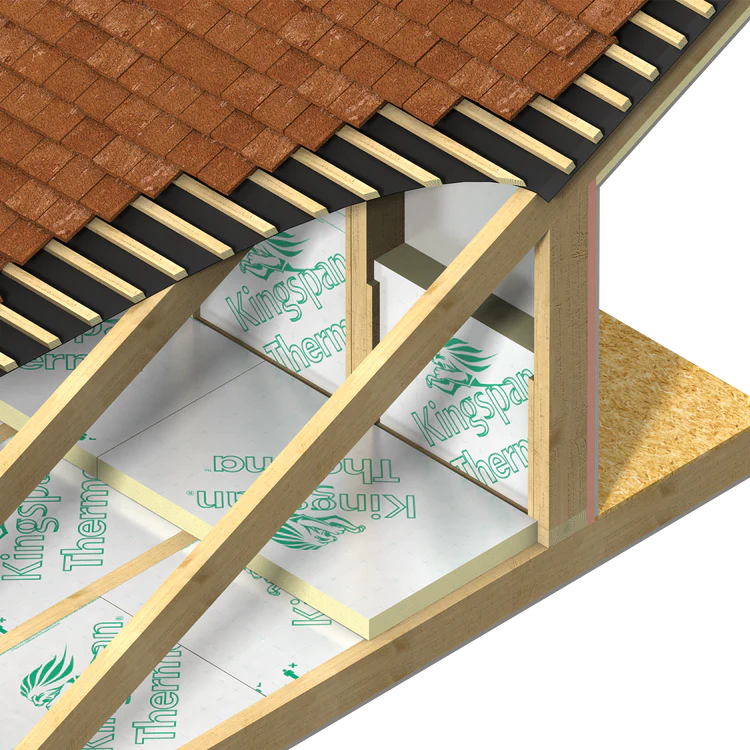
A fundamental concern for any loft boarding project is the structural capacity of the existing ceiling joists. In the vast majority of UK homes, these joists were designed primarily to support the ceiling lining (plasterboard) and to tie the pitched members of the roof together, preventing them from spreading outwards. They were not constructed with the capacity to support significant additional weight, such as the static load of flooring materials combined with the dynamic load of stored items and foot traffic.
Adding flooring boards and then filling the space with stored goods places an excessive additional load on these ceiling joists, potentially exceeding their designed capacity. This situation risks structural failure or significant deflection, which could manifest as cracking in the ceiling below. If storage is concentrated and heavy (for example, boxes of books or archives), the effect is amplified, particularly if the weight is focused near the centre of the joist span, where maximum deflection occurs. This concentration of weight accelerates structural fatigue over time. Due to this potential hazard, homeowners planning any substantial alteration or significant storage should contact a building control body, typically the local council, to discuss the structural implications under Part A.
1.3 The Critical Link: Thermal Performance (Part L1B) and Ventilation (Part F)
Adherence to modern thermal performance standards is perhaps the most frequent compliance challenge in loft boarding. UK Building Regulations recommend a minimum insulation depth of 270mm, usually provided by mineral wool.
It is absolutely essential that insulation is not compressed or squashed. Insulation functions by trapping air; when compressed, the volume of trapped air is reduced, leading to a significant loss of thermal efficiency. This reduction in thermal performance directly contravenes Part L1B and also creates conditions ripe for long-term damp and condensation issues.
The necessity of the full insulation depth directly clashes with the need for a load-bearing floor, meaning traditional boarding directly onto joists is unacceptable. A raised loft floor solution, typically involving specialised legs, must be used to keep the boards suspended above the required 270mm depth of mineral wool.
Furthermore, the loft space must be able to "breathe" to manage moisture that rises from the living spaces below. If insulation is packed too tightly or extends fully to the roof structure, it blocks essential airflow, leading to stagnant areas where moisture accumulates. This moisture then condenses on cold surfaces, leading to mould growth, damp patches, and damage to roof rafters. Compliance requires maintaining cross ventilation, typically achieved through clear soffit and ridge vents. Crucially, a
50mm airflow gap must be preserved between the surface of the insulation and the eaves vents or the underside of the roof deck. This practice prevents the condensation feedback loop: by ensuring proper ventilation, moisture is removed, preserving the insulation performance and mitigating the risk of mould and timber decay.
Section 2: Materials Specification and System Selection
2.1 Standard Materials for Loft Boarding
The materials selected must be appropriate for creating a durable, stable, non-habitable storage platform.
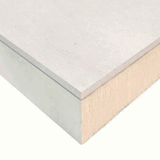
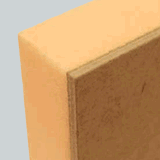
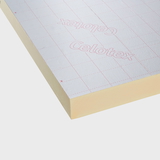
The flooring material itself is usually tongue and groove (T&G) chipboard or OSB (Oriented Strand Board), typically supplied in 18mm or 22mm thickness. The T&G profile is vital because it enables the boards to interlock, distributing the load across the support structure and providing inherent rigidity to the overall platform.
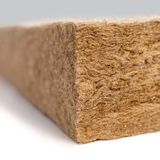
The preferred insulation material in this context is mineral wool, installed as rolls or batts to achieve the minimum recommended depth. For secure fixing, standard wood screws are required, though specialised screws are often used to ensure boards remain tight and stable over time, reducing the likelihood of squeaking or movement.
Buy Loft Boards now


2.2 The Function and Selection of Raised Loft Flooring Systems
Achieving regulatory adherence in modern loft boarding relies entirely on the successful implementation of a raised flooring system. These systems, often proprietary products using plastic or engineered timber legs, fulfil two simultaneous regulatory mandates.
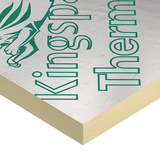
The primary function of the legs is mechanical: they elevate the floor structure significantly higher than the existing joists to accommodate the 270mm depth of uncompressed insulation. The raising system ensures that the full volume of the insulation is retained, maximising its thermal performance, which is represented by its specific thermal resistance value. Furthermore, the system is designed to maintain the mandatory 50mm ventilation void between the insulation surface and the newly laid boards, securing Part F compliance.
When selecting a raised system, consideration must be given to how the system contacts the underlying structure. If supports are excessively wide or constructed entirely of conductive material (such as metal or thick, dense timber), they can create significant thermal bridges, allowing heat to bypass the insulation layer. The best practice involves using supports that minimise the cross-sectional area contacting the cold air, often employing non-conductive materials to maintain the thermal integrity of the floor assembly.
Table 1: Materials and Purpose
| Component | Typical Material | Function and Regulatory Relevance | |
| Loft Boards | 18mm or 22mm T&G Chipboard/OSB | Creates stable storage platform; T&G ensures load distribution and rigidity. | |
| Raised Support System |
|
Essential for compliance with Part L (non-compression) and Part F (ventilation gap). | |
| Insulation (Mineral Wool) | Roll or Batt | Thermal barrier; achieving 270mm depth minimum, maximising efficiency without compression. | |
| Fixings | Appropriate wood screws | Secures boards to the raised system; specialised screws aid in long-term stability. |
Section 3: Pre-Installation Compliance and Safety Protocols
Thorough preparation is paramount to ensure both the safety of the installation and long-term building integrity. This involves addressing electrical services and refining moisture management practices.
3.1 Managing Electrical and Fire Safety (Part B) 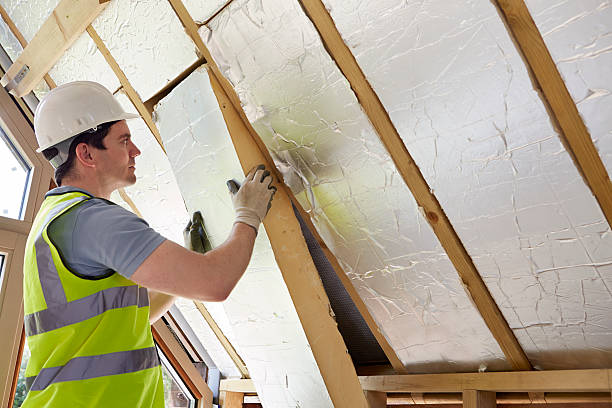
Electrical safety is critical in the loft space. All necessary electrical work, including the modification or routing of existing circuits, must be fully completed before any boards are laid. High-voltage cables must be kept safe and clear. Standard building practice dictates that electrical cables running through the loft space should not be buried beneath layers of insulation, as the heat generated by the electrical current cannot dissipate effectively. This overheating risks melting the cable sheath and creating a significant fire hazard.
To mitigate this risk, cables should ideally be secured to the side of the joists or run above the insulation layer, within the 50mm ventilated gap created by the raised floor system. If any non-standard insulation materials, such as loose polystyrene balls, are present, they must be removed due to the heightened fire risk they present.
3.2 Ventilation and Moisture Management
Before installation commences, the entire ventilation system must be checked. Eaves and soffit vents must be visually inspected and confirmed to be clear and fully unobstructed.
When installing mineral wool, extreme care must be taken to ensure the material does not entirely fill the cavity right up to the roof structure. This physical obstruction compromises the critical 50mm air path required for cross-ventilation. The insulation must conform to the target depth (e.g., 270mm) but must never be tightly packed against the surrounding eaves or roof components, as this creates stagnant air pockets. Even with a compliant raised floor, the homeowner must consider the pattern of storage. Stacking materials densely, such as large boxes of clothes or paper, can create localised stagnation zones above the floor boards that impede air movement within the loft volume. It is recommended to leave a perimeter gap of unboarded space near the eaves/soffit to promote maximum air exchange throughout the loft volume.
Section 4: Step-by-Step Guide to Installing a Raised Loft Floor
The following procedure outlines the installation of loft boards using a raised flooring system, ensuring adherence to thermal and ventilation requirements.
4.1 Preparation and Installation of the Raised Support System
The first action involves clearing the area. If a top-up layer of insulation is present, it should be carefully rolled back temporarily to expose the tops of the existing ceiling joists or trusses.
Next, the proprietary floor raising system must be installed. The supports, such as specialised legs, are screwed directly into the exposed joists/trusses. The positioning of these legs must be precise, following the manufacturer’s instructions, to ensure that they align perfectly with the edges and intermediate support requirements of the loft boards that will be placed upon them.
4.2 Laying the Full Insulation Depth
Once the supports are secured, the mineral wool insulation can be laid back into position or installed if new material is being used. The insulation must be gently placed to achieve the full, recommended depth of 270mm without any compression. The insulation will sit snugly beneath the top of the supports, leaving the pillar sections clear to hold the weight of the floor boards. It is necessary to re-verify that the mandatory 50mm airflow gap remains above the insulation layer and below the point where the new boards will rest.
4.3 Securely Fitting the Loft Boards
Installation should commence at the most accessible point, typically starting from the loft hatch, and proceeding outwards toward the perimeter. Boards must be cut to length where required using a handsaw or jigsaw.
Tongue and groove connections must be fitted precisely. The tongue of the new board is slid into the groove of the adjacent, already fixed board, ensuring a firm, secure connection that creates a rigid joint. If there is resistance during this connection, a protective method should be used: place a block of waste wood along the outer edge of the board and strike the block gently with a hammer. Tapping the block, rather than the vulnerable board edge itself, prevents damage.
The boards are then secured to the raised support system. Two or three screws should be used per joist or support point along the board’s run. Care must be taken to ensure all fixings are tight and secure, eliminating any movement or wobbly boards, but avoiding overtightening that might strip the wood or the supports. Finally, a small perimeter gap, typically 5 to 10mm, should be left around the edges of the boarded area to permit natural wood expansion and contraction over seasonal changes.
4.4 Customising the Hatch Access
For safe and compliant access, the board spanning the loft hatch opening must be customised. A board should be positioned fully over the hatch, ensuring it sits securely within the T&G connection to adjacent boards. It is then marked precisely from the underside, indicating the boundary of the access opening. The board is removed, turned over, and the marked section is accurately cut out using an appropriate tool, such as a handsaw or jigsaw. This ensures that the floor seamlessly meets the hatch frame, allowing safe passage.
Section 5: The Procedure for Temporary Access and Non-Destructive Board Removal
Loft boards must be removable to permit long-term maintenance, inspection, or repair of essential services, such as electrical wiring, plumbing, or the roof structure itself. The robust, interlocking nature of tongue and groove boards, while excellent for stability, makes selective removal difficult.
5.1 Strategic Removal of Tongue and Groove Boards 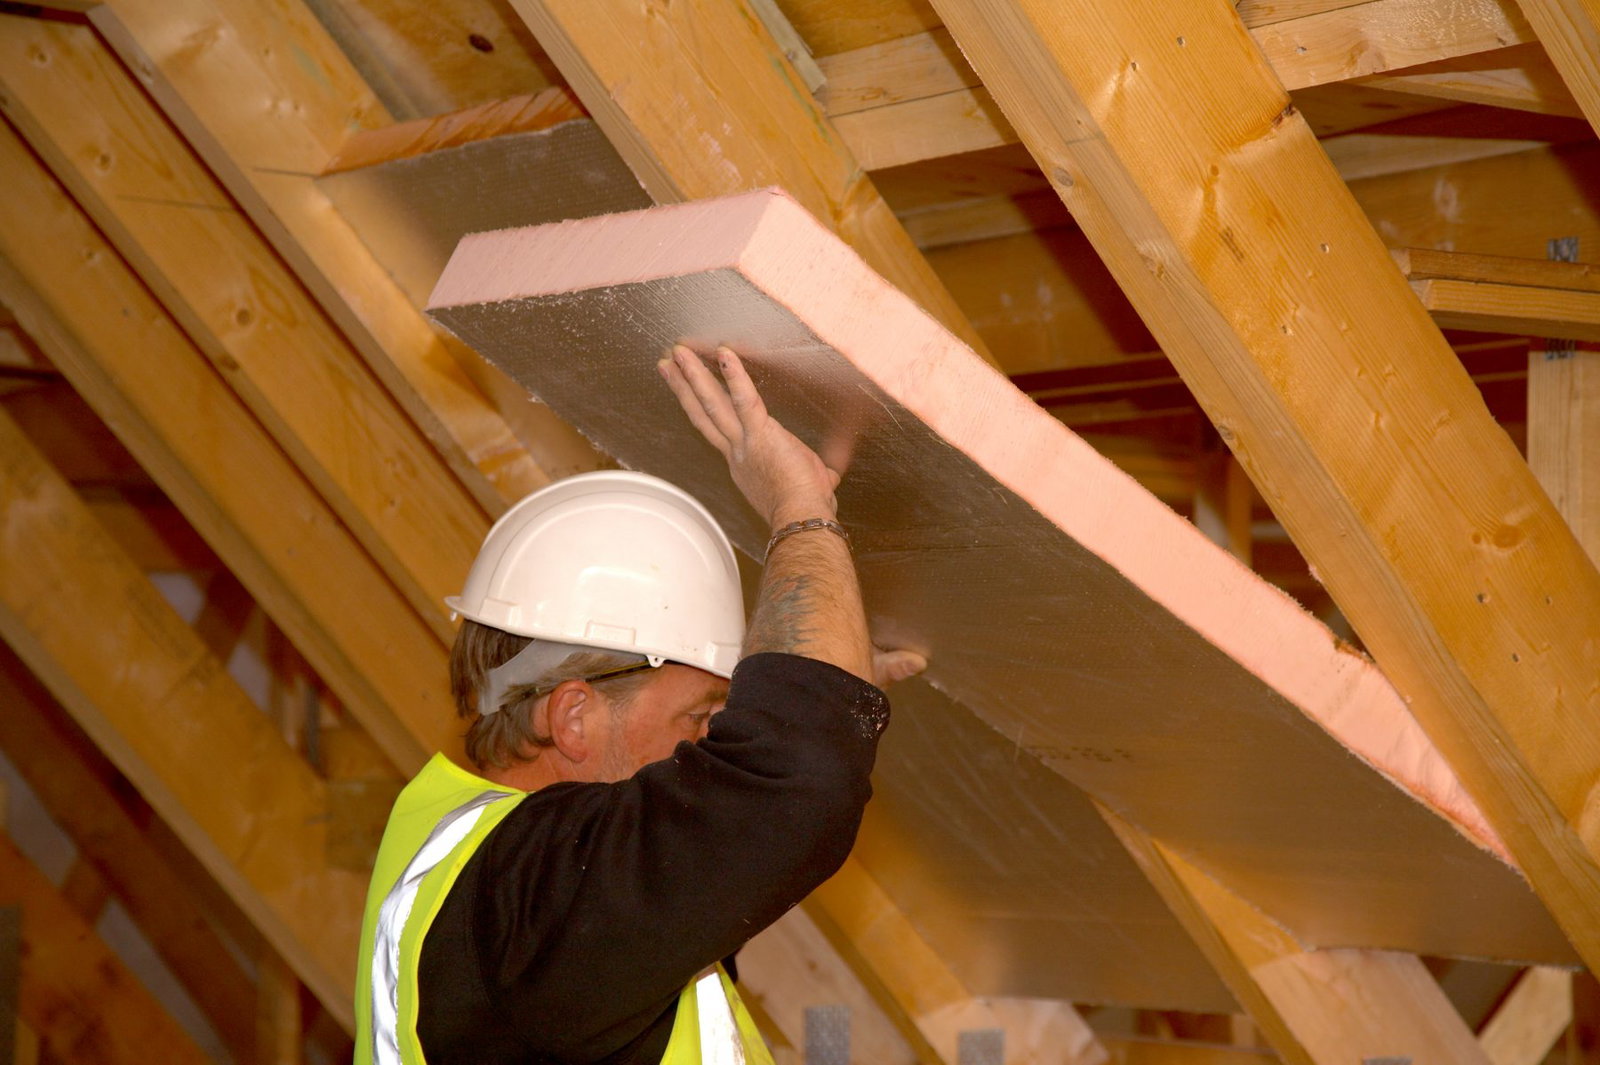
Tongue and groove connections lock boards together across their width, meaning an individual board cannot simply be lifted out without releasing the joint.
The most common technique for accessing services below a fully boarded T&G floor involves sacrificing the first board in the run. This often means removing the screws and carefully cutting through the tongue along the edge where the first board meets the second. Once the sacrificial board is fully removed, the groove of the adjacent board is exposed, permitting it to be lifted.
The removal of subsequent boards requires the use of appropriate leverage. After unscrewing a board, tools such as a sturdy crowbar or a specialised pallet buster are used to gain purchase underneath the board. Pressure must be applied carefully and systematically along the length of the board to lift it clear of the supports without cracking the material. Users should wear gloves as a precaution, as the cut edges of the material can be sharp.
5.2 Optimising for Future Maintenance Access
The recurring need to damage or replace a sacrificial board whenever critical services require attention represents a long-term cost and inconvenience. Consequently, advanced planning is recommended for areas known to contain utility services (e.g., boiler flues, main electrical runs).
For these critical locations, it is far more effective to install a designated inspection hatch or access panel system. This involves creating a small section of boards that lifts out easily, secured only by surface screws, rather than relying on the T&G connection for stability. Alternatively, the T&G edges can be intentionally cut clean, and the panel secured using removable brackets or easily accessible screws. This preparation ensures truly non-destructive access, maintaining the integrity of the surrounding floor structure while facilitating quick maintenance.
Section 6: UK Standards and Best Practice Synthesis
6.1 Compliance Checklist and Risk Mitigation
Adhering to correct installation procedures safeguards the property from significant building pathology and ensures compliance with UK standards. Ignoring these requirements can negate the substantial investment already made in insulating the home, leading to increased heating costs and potential structural defects.
The following table provides a summary of regulatory compliance points that must be addressed before and during loft boarding.
Table 2: UK Building Regulation Compliance Summary
| Building Regulation Part | Focus Area | Key Requirement for Loft Storage | Consequence of Non-Compliance |
| Part A | Structure | Existing joists must safely bear additional load; professional structural assessment is vital for heavy storage. | Structural failure, risk of ceiling damage, insurance liability concerns. |
| Part L1B | Thermal Efficiency | Insulation must be uncompressed (recommended minimum 270mm depth); requires a raised floor system. | Significant heat loss, reduced thermal performance of the dwelling. |
| Part F | Ventilation | Maintain a continuous 50mm airflow gap above insulation and ensure clear cross-ventilation, particularly at the eaves. | Condensation build-up, mould proliferation, timber decay, degraded internal air quality. |
| Part B | Fire Safety | All electrical cables must be secured above the insulation, ensuring they are not crushed or restricted, to mitigate heat risks. | Potential fire hazard from overheating cables. |
6.2 Conclusion
The installation of loft boarding offers significant benefits by converting unused roof voids into practical storage spaces. However, this is not a straightforward DIY project if modern UK building compliance is the objective. The technical requirements of deep insulation (Part L1B) and mandatory ventilation (Part F) necessitate the use of specialised, proprietary raised flooring systems to prevent thermal failure and condensation. Furthermore, the structural limitations of existing ceiling joists (Part A) mandate careful consideration of the intended storage load. By choosing compliant materials and strictly following procedures that prioritise airflow, thermal integrity, and structural capacity, a homeowner can create a safe, stable, and highly functional storage area that respects the building’s overall fabric and energy performance.
Legal Disclaimer (UK)
The information contained within this guide is provided for general informational and educational purposes only. It is not intended to substitute professional structural, thermal, legal, or technical advice regarding any specific individual circumstance or property. UK Building Regulations are frequently updated, and site conditions (such as existing joist capacity, cable routing, and existing moisture levels) vary significantly from one property to the next.
This content must not be used to specify materials or construction methods without the express review and approval of a qualified structural engineer, surveyor, or local authority building control body. You should not act or refrain from acting on the basis of this content without obtaining specific, professional advice tailored to your property. We accept no liability for any loss or damage caused by reliance upon this information. You are strongly advised to obtain all necessary professional consultations and approvals before commencing any construction work.

Samuel Hitch
Managing Director
Buy Insulation Online.
Leave A Reply
Your feedback is greatly appreciated, please comment on our content below. Your email address will not be published. Required fields are marked *