- Blogs
- A Comprehensive Guide to Campervan Insulation for the UK Climate
A Comprehensive Guide to Campervan Insulation for the UK Climate


TLDR
For a successful UK campervan conversion, a multi-layered approach to insulation is essential. The primary goal is managing temperature and, critically, controlling condensation. A recommended strategy involves applying sound-deadening mats directly to the van's metal panels first. For large, flat areas like the floor and ceiling, use rigid polyisocyanurate (PIR) foam boards. Fill awkward cavities and curved sections with flexible materials like recycled plastic wool or closed-cell foam sheets. When using any fibrous insulation (wool, recycled plastic), a meticulously sealed vapor barrier is crucial to protect the van's structure from moisture. Finally, effective active ventilation, such as a powered roof fan, is not optional; it is a mandatory component for removing the moist air generated inside and preventing dampness, mold, and corrosion in the UK's climate.
Introduction: Why Insulation is the Foundation of Your UK Campervan Conversion
In the United Kingdom, converting a van into a camper is an exercise in creating a comfortable and durable living space that can withstand the specific challenges of the climate. Effective insulation is the critical first step in this process. It is about far more than just staying warm during a winter trip; it is about regulating the internal environment year-round, from cool, damp springs to surprisingly hot summer days.
The primary challenge for any UK-based converter is the management of moisture. The temperate maritime climate means high humidity and cool temperatures are common, creating the perfect conditions for condensation inside a vehicle. Unchecked, this moisture can lead to significant problems, including the growth of mold on interior surfaces and within hidden cavities and the eventual corrosion of the vehicle's steel bodywork. This guide provides a comprehensive overview of campervan insulation, covering the essential principles, the most suitable materials for the UK, detailed installation practices, and the important safety standards and legal regulations that must be considered.
The Principles of Keeping Your Campervan Comfortable
Managing Temperature: More Than Just Keeping Warm
A campervan's metal shell is a highly effective conductor of heat. This means it rapidly loses warmth to the cold air outside in winter and absorbs the sun's heat quickly in summer, turning the interior into an oven. The fundamental purpose of insulation is to slow down this transfer of heat. Heat moves in three ways, and a good insulation strategy must address all of them.
Conduction: Heat travelling through a solid material. This is the primary way heat escapes through the van's metal body and chassis. Insulation materials work by having a low thermal conductivity, slowing this process down.
Convection: Heat moving through the movement of air. Air gaps and draughts, particularly around doors, allow warm air to escape and cold air to enter, creating noticeable cold spots.
Radiation: Heat travelling as electromagnetic waves. This is how the sun heats the van's exterior. Reflective materials can help to block this form of heat transfer.
The Real Challenge: Understanding and Defeating Condensation
While temperature control is important, the most persistent and destructive issue for UK van converters is condensation. It occurs when the warm, moist air generated inside the van—from breathing, cooking, or using a heater—comes into contact with a cold surface, such as the van's metal panels or windows. The water vapor in the air then cools and turns back into liquid water droplets.
If this moisture is allowed to accumulate, it can have severe consequences. It saturates absorbent insulation materials, rendering them ineffective and promoting mold growth. It can seep into wooden framework and plywood panels, causing them to rot. Most critically, constant moisture against the van's steel panels will inevitably lead to rust and structural corrosion. Therefore, the entire insulation strategy, including the choice of materials, the use of vapor barriers, and the provision of ventilation, must be viewed as an interconnected system designed primarily to manage and mitigate moisture.
A Practical Guide to Insulation Materials for UK Van Conversions
There is no single "best" insulation material for every part of a campervan. The most effective approach involves using a combination of different materials, each selected for its specific properties and the area of the van it is intended for. This systemic approach ensures optimal performance across the entire vehicle.
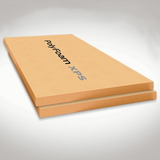
Rigid Insulation Boards (PIR and XPS) 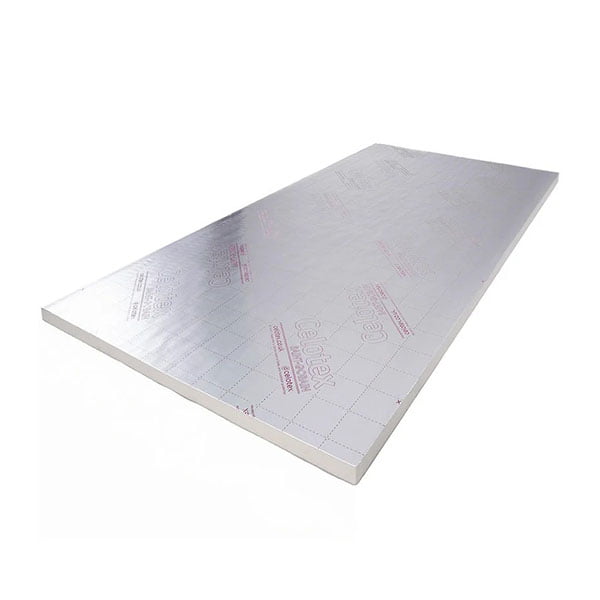
Rigid foam boards are ideal for insulating the large, flat surfaces of a van, such as the floor, ceiling, and larger wall panels.
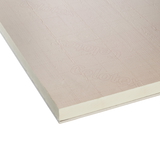
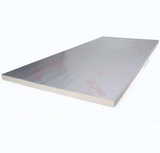
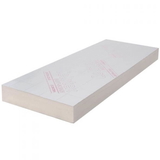
PIR (Polyisocyanurate): This is a very common choice in UK conversions, with well-known brands including Celotex, Kingspan, and Recticel. PIR boards offer excellent thermal performance, are resistant to mould, and are typically faced with a layer of aluminium foil. This foil helps to reflect radiant heat and, if the joints are taped, can contribute to a moisture-resistant layer.
XPS (Extruded Polystyrene): XPS is an alternative to PIR. Its main advantage is its closed-cell structure, which makes it highly resistant to water absorption. However, its thermal performance is generally slightly lower than PIR for a product of a similar thickness and price.
Flexible and Loose-Fill Insulation
These materials are essential for filling the irregular voids, curved panels, and structural pillars where rigid boards cannot be used.
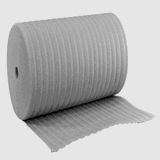
Recycled Plastic Insulation: Made from recycled PET bottles, this is an environmentally conscious and increasingly popular choice. A 2023 study found it was the most used thermal insulation in conversions. It is lightweight, does not absorb moisture readily, and is not an irritant to work with. Specialized products like Dodo Mat Thermo Fleece are based on this material.
Sheep's Wool: A natural and sustainable option prized for its breathability. Sheep's wool has the unique ability to absorb a significant amount of moisture from the air without losing its insulating properties, releasing it again when conditions become drier. It is, however, more expensive than recycled plastic and may require chemical treatment to prevent pests and odors.
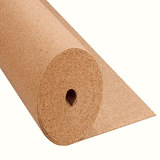
Closed-Cell Foam: Supplied in self-adhesive sheets of various thicknesses (e.g., 6mm, 10mm), this material is completely waterproof and does not absorb moisture. When applied directly to the van's metal panels, it creates a thermal break and acts as its own vapour barrier, preventing condensation from forming on the metal itself. This makes it a very effective, albeit more expensive, solution.
Mineral Wool: Products like Rockwool are effective insulators and are hydrophobic, meaning they repel water. However, they can release fine fibres during installation, meaning Personal Protective Equipment (PPE) such as a mask, gloves, and goggles is required to avoid skin and respiratory irritation.
Supplementary Materials
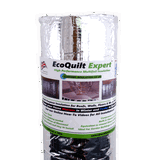
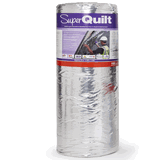
Multifoil/Bubble Foil Wraps: These products, often sold in campervan-specific kits, consist of one or more layers of bubble wrap sandwiched between reflective foil sheets. While not sufficient as a primary insulator on their own, they are very effective when used as a vapor control layer over other insulation types, and their reflective surface helps to block radiant heat.
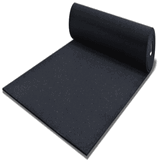
Sound Deadening Mats: This is a critical first layer that should be applied before any thermal insulation. These are thin, dense, self-adhesive sheets made from a butyl rubber compound. Products like Dodo Mat Deadn Hex or PeaceMAT are applied to the center of large metal panels to add mass and stop them from vibrating and resonating, which dramatically reduces road noise and the sound of rain.
Table 1: Campervan Insulation Materials at a Glance
Material |
Best Use |
Moisture Resistance |
Ease of Installation |
Key Consideration |
| PIR Board | Large flat surfaces (floor, ceiling, walls) | Good (foil-faced) | Moderate (requires precise cutting) | High thermal performance for its thickness. |
| XPS Board | Floor, walls, ceiling | Excellent | Moderate (requires precise cutting) | More water-resistant than PIR but slightly lower thermal performance. |
| Recycled Plastic Wool | Cavities, pillars, curved sections | Good | Easy (can be torn and stuffed) | Eco-friendly, non-irritant, and cost-effective |
| Sheep's Wool | cavities, pillars, curved sections | Excellent (manages moisture) | Easy (can be torn and stuffed) | Natural and breathable, but more expensive and may require treatment. |
| Closed-Cell Foam Sheets | Direct to metal panels, curves, floors | Excellent (waterproof) | Easy (self-adhesive) | Acts as insulation and vapour barrier in one, but can be costly. |
| Mineral Wool | Cavities, pillars | Good (hydrophobic) | Difficult (PPE required) | Can cause skin and respiratory irritation during installation |
Step-by-Step Guide to Insulating Your Campervan
A methodical approach to installation is key to achieving a professional and effective result. The process should follow a logical sequence of layers.
Stage 1: Preparation – The Clean Slate
The first step is to prepare the van's interior thoroughly. This involves stripping out any existing plywood lining, flooring, and factory fittings to expose the bare metal structure. All surfaces must be cleaned of dust, grease, and grime to ensure that adhesive products will bond effectively. This is also the perfect opportunity to inspect for any existing rust, treat it properly, and apply a protective coating like Waxoyl inside hidden cavities to prevent future corrosion.
Buy Campervan Insulation now

Stage 2: Applying Sound Deadening
With the van clean and bare, the first layer to apply is sound deadening. Using a roller, apply self-adhesive butyl mats to the large, flat metal areas of the floor, walls, ceiling, and particularly the wheel arches, which transmit a lot of road noise. The aim is not to achieve 100% coverage; applying the mat to the centre 50-70% of a panel is usually sufficient to stop it from vibrating and acting like the skin of a drum.
Stage 3: Insulating the Floor, Walls, and Ceiling
Before insulating, it is common practice to build a wooden support frame, or 'furring', on the walls and ceiling using timber battens.6 This frame creates the cavities that will hold the insulation and provides a solid structure to which the final interior panels (e.g., plywood) can be attached.
Floor: Cut rigid PIR or XPS boards to fit snugly between the timber battens of the floor subframe.
Walls & Ceiling: For the large, flat sections, cut rigid PIR boards to size. These can be secured in place using a high-strength spray adhesive, double-sided sticky tape, or specialised insulation stick pins, which are pushed through the board and glued to the van wall.
Stage 4: Filling the Gaps and Cavities
This is a crucial step for preventing thermal bridges where heat can bypass the main insulation. Every void, pillar, and structural rib must be filled with a flexible insulation material. Gently push recycled plastic wool, sheep's wool, or offcuts of closed-cell foam into these spaces. It is important not to compress or squash the insulation material tightly, as its effectiveness comes from the pockets of air trapped within its fibres. Compressing it reduces these air gaps and lowers its insulating capability.
The Vapour Barrier: Your Van’s Defence Against Damp 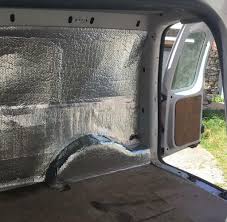
The topic of whether to install a vapour barrier is one of the most debated among van converters. The decision is not a simple yes or no, but depends entirely on the type of insulation materials used in the build.
What is a Vapour Barrier and Why is it Controversial?
A vapour barrier, also known as a Vapour Control Layer (VCL), is a sheet of impermeable material installed on the warm (interior) side of the insulation. Its job is to prevent the warm, moisture-laden air from inside the van from passing through the insulation and reaching the cold outer metal skin, where it would condense.
The controversy arises from differing insulation philosophies and the risk of incorrect installation.
The case for a vapour barrier: When using any type of fibrous or absorbent insulation, such as recycled plastic, sheep's wool, or mineral wool, a vapour barrier is considered essential. Without it, these materials can absorb condensation, becoming a damp mass that loses all insulating properties and actively promotes rust on the van's bodywork. A perfectly sealed barrier protects both the insulation and the vehicle's structure.
The case for caution: A poorly installed vapour barrier with even small holes, tears, or unsealed joints can be worse than having no barrier at all. This is because it allows moisture to get into the wall cavity but prevents it from escaping, trapping it against the metal and accelerating corrosion. Some insulation materials, particularly closed-cell foam, are inherently waterproof and non-absorbent. When these are glued directly to the van panels, they form their own vapour barrier, making an additional layer unnecessary and potentially creating a trap for moisture between the layers.
Making the Right Choice for Your Build
The decision on whether to use a vapour barrier is a direct consequence of the primary insulation material chosen.
If using fibrous insulation (recycled plastic, sheep's wool): A vapour barrier is highly recommended. The build philosophy here is to create a breathable insulated cavity and then protect it with a sealed membrane.
If using non-absorbent insulation (closed-cell foam, foil-faced PIR boards): A separate vapour barrier is often not required, provided the insulation itself is installed to be airtight. For PIR boards, this means meticulously sealing all joints and edges between boards with aluminium foil tape. For closed-cell foam, the material itself acts as the barrier.
How to Install a Vapour Barrier Correctly
If a vapour barrier is required, its effectiveness depends entirely on achieving a perfect, continuous seal.
Choose a durable material like a foil-backed bubble wrap product or a dedicated VCL membrane. Avoid using thin, flimsy plastic sheeting, which is easily punctured during the build process.
Install the barrier over the top of the insulation, on the interior side of the wooden framing.
The most critical step is to tape every single join, seam, and edge with a high-quality aluminium foil tape. Overlap sections of the barrier material and tape them together to create an airtight seal. Any holes made for wires or fixtures must also be carefully sealed.
Ventilation: The Essential Partner to Insulation
A well-insulated and sealed campervan is excellent at keeping heat in, but it is also excellent at trapping moisture. Activities like breathing, cooking, and drying wet clothes release a significant amount of water vapour into the small interior space. Without a mechanism to remove this moist air, it will inevitably condense on the coldest available surfaces, typically the windows. Therefore, a proper ventilation system is not an optional extra; it is a mandatory partner to any effective insulation system.
Choosing Your Ventilation: Passive and Active Systems
Ventilation can be achieved through passive or active means, and a combination of both is often the best solution.
Passive Ventilation: This method relies on natural airflow and includes options like floor vents, louvred wall vents, and simply opening a window. While useful for providing a constant background level of air exchange, passive vents are often insufficient to deal with the high levels of moisture produced during cooking or when the van is occupied overnight.
Active Ventilation: This uses a powered fan to physically force air in or out of the van. The most effective and popular solution for a campervan is a roof-mounted fan, such as a MaxxFan or Fiamma Turbo-Vent. These units can be set to either extract stale, damp air from inside or draw fresh air in from outside, giving the user complete control over the interior climate and humidity levels.
For maximum effectiveness, a system of cross-ventilation is recommended. This can be achieved by pairing a low-level passive vent to draw in cool, fresh air with a high-level active roof fan set to extract the warm, moist air that naturally rises.
Ventilation for Gas Appliances
It is a critical safety requirement that any permanently installed gas appliances, such as a hob or a water heater, have adequate ventilation as specified by regulations. This is to ensure the complete combustion of the fuel and to prevent the dangerous build-up of carbon monoxide or unburnt gas inside the vehicle.
UK Standards and Regulations: A Converter’s Guide 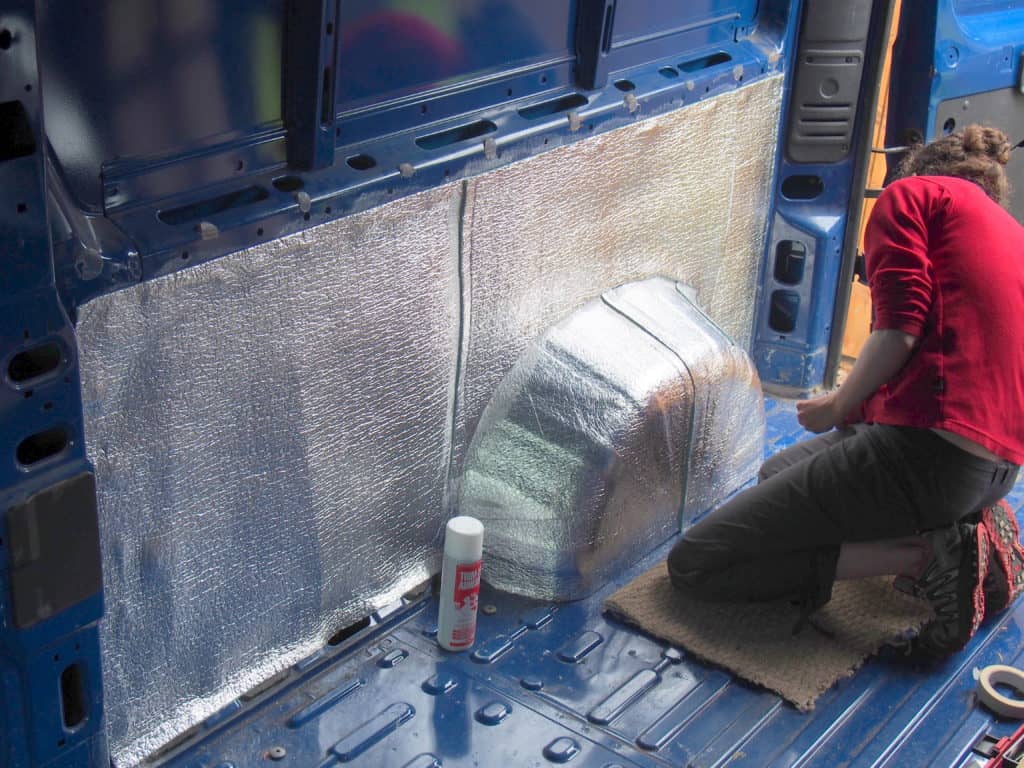
Converting a van into a campervan in the UK involves navigating a number of legal and safety regulations. A successful and compliant build requires these to be considered from the very start of the design process, as they can influence major structural decisions.
Reclassifying Your Van: The DVLA 'Motor Caravan' Requirements
The Driver and Vehicle Licensing Agency (DVLA) records the 'body type' of every vehicle. While it is not always mandatory to change a van's classification to 'Motor Caravan' after conversion, doing so can have benefits for insurance purposes and may be required by some insurers.
To have a vehicle reclassified, the DVLA must be satisfied that it meets a strict set of criteria for both internal and external features, and that its external appearance is recognisably that of a motor caravan in traffic.
Internal Feature Requirements
The DVLA mandates that the vehicle must contain permanent, rigidly fixed living accommodation equipment across four categories.
Seats and Table: There must be a permanently secured seating area with a table. The table mounting must be a permanent fixture, although the tabletop itself can be designed to be removable.
Sleeping Accommodation: There must be a permanent bed, which can be a fixed bed or one that converts from the seating area. The bed base must be securely fixed to the vehicle's floor or walls.
Cooking Facilities: A minimum of a single-ring hob or a microwave must be permanently and securely fixed to the vehicle's floor or side wall. If it is gas-powered, the gas bottle and supply pipes must also be permanently secured.
Storage Facilities: There must be at least one permanent storage unit, such as a cupboard or locker, securely fixed inside the living area.
External Feature Requirements
The DVLA also requires the vehicle to have a combination of external features that make it look like a motor caravan. These include :
Two or more windows on at least one side of the main body (not including the cab doors).
A separate habitation door providing access to the living area.
Motor caravan-style graphics on both sides of the vehicle.
An awning bar attached to the side.
A fixed high-top roof. The DVLA explicitly states that a pop-top or elevating roof does not meet this requirement for reclassification purposes.
These external rules can significantly impact the build. For instance, a desire for a 'stealth' camper may be incompatible with the requirement for graphics, and the popular choice of a pop-top roof will prevent the vehicle from being reclassified as a 'Motor Caravan'. These are major design and financial decisions that must be made at the project's outset.
Table 2: DVLA 'Motor Caravan' Internal Feature Checklist
Feature |
DVLA Requirement (Simplified) |
| Seats | Permanently fixed to floor/wall, for use at the table. |
| Table | Mounting arrangement is a permanent fixture; tabletop can be removable. |
| Sleeping Accommodation | Permanent bed or seat-to-bed conversion, fixed to floor/wall. |
| Cooking Facilities | Minimum of a single hob or microwave, permanently fixed. |
| Storage | At least one permanent cupboard or locker, fixed to floor/wall. |
Fire Safety Regulations for Campervans
True safety compliance extends far beyond simply carrying a fire extinguisher; it involves the materials used in the construction of the interior itself.
The Furniture and Furnishings (Fire) (Safety) Regulations 1988
This is a critical and often overlooked piece of legislation. These regulations apply to all domestic upholstered furniture, and the definition of 'dwelling' within the law explicitly includes caravans. This means that any materials used for seating, cushions, and mattresses in a campervan conversion must comply with specific fire resistance standards. This includes both the foam filling material (which should be combustion-modified, or CM, foam) and the outer cover fabrics, which must pass a match resistance test. Converters have a legal responsibility to source and use compliant materials. Compliant furniture should carry a permanent label detailing its compliance.
Fire Extinguishers, Smoke Alarms, and Carbon Monoxide Detectors
Fire Extinguishers: While not a legal requirement for privately owned vehicles, it is strongly recommended to carry at least one. A 1kg or 2kg ABC Dry Powder extinguisher is a versatile choice suitable for tackling solid, liquid, and gas fires. However, caution is advised when using powder extinguishers in very confined spaces as the powder can obscure vision and be inhaled.
Smoke and CO Alarms: It is essential to fit both a smoke alarm and a carbon monoxide (CO) detector. An optical-type smoke alarm is recommended as it is more effective at detecting the slow, smouldering fires that can originate from upholstery. A CO detector is vital if any fuel-burning appliances (gas or diesel) are installed. Alarms should be certified to the relevant British Standards: BS EN 14604 for smoke alarms and BS EN 50291 for CO alarms.
Gas and Electrical System Safety
For safety-critical systems, professional expertise is paramount.
Gas: Any permanent gas installation must be installed and certified by a Gas Safe registered engineer to ensure it meets legal safety standards.
Electrics: Electrical wiring should comply with British Standard BS7671. While not a legal requirement for a DIY build, having the final installation inspected and signed off by a qualified electrician is a highly advisable safety measure.
Conclusion: Building a Comfortable and Compliant Campervan
Creating a successful campervan conversion for the UK requires a holistic and informed approach. It is not simply a case of choosing one insulation material, but of designing and implementing an entire system. This system must combine different types of insulation chosen for their specific location, a meticulously installed vapour barrier where required, and a robust ventilation system capable of actively managing the interior climate.
Furthermore, a safe and legal conversion demands that UK regulations are not an afterthought but a core part of the initial design process. From the external appearance required by the DVLA to the specific fire-retardant properties of the foam used in the seating, these rules shape the build from day one. By understanding these interconnected principles of thermal performance, moisture management, and regulatory compliance, converters can create a campervan that is not only comfortable and warm but also safe, durable, and fit for years of adventure on the road.
Legal Disclaimer
This content is intended to provide helpful advice and guidance and is not a definitive statement of law. The information provided does not constitute legal, engineering, or other professional advice. You should consult a qualified professional adviser for specific advice tailored to your situation. Any gas systems must be installed and certified by a Gas Safe registered engineer, and it is strongly recommended that electrical systems are inspected by a qualified electrician. All regulations and requirements should be independently verified with the relevant authorities, including but not limited to the DVLA and your local Trading Standards office. The publisher is not liable for any damages arising from the use of or inability to use this site or any material contained in it, or from any action or decision taken as a result of using the information provided.

Samuel Hitch
Managing Director
Buy Insulation Online.
Leave A Reply
Your feedback is greatly appreciated, please comment on our content below. Your email address will not be published. Required fields are marked *