- Blogs
- A Comprehensive Technical Guide to Insulating UK Walls with Vapour Barrier Insulated Plasterboard
A Comprehensive Technical Guide to Insulating UK Walls with Vapour Barrier Insulated Plasterboard


TLDR
Internal wall insulation using vapour barrier insulated plasterboard is a critical solution for upgrading the thermal efficiency of the UK's ageing building stock, particularly solid-walled properties. This method combines high-performance insulation cores such as Polyisocyanurate (PIR) or Phenolic foam with a gypsum plasterboard surface and an integrated aluminium foil vapour control layer. This integrated approach effectively manages heat loss while preventing the hazardous accumulation of interstitial condensation within the wall structure. Compliance with the 2022 Part L Building Regulations necessitates specific U-value targets, often achieved through careful material selection and precise installation techniques. Whether employing the direct bonding 'dot and dab' method or mechanical fixing to timber battens, maintaining the integrity of the vapour barrier and ensuring fire safety through continuous adhesive ribbons and intumescent putty pads is essential. This guide provides a detailed technical overview of materials, regulatory requirements, and installation best practices for professionals and property owners in the United Kingdom.
The Technical and Historical Context of UK Wall Insulation
The residential landscape of the United Kingdom is defined by a significant volume of traditional masonry construction. A substantial proportion of the housing stock consists of buildings erected prior to the widespread adoption of cavity wall construction in the 1930s. These older properties typically feature solid brick or stone walls, which lack the inherent air gap found in modern buildings. Without this gap, heat transfers rapidly through the masonry, leading to significant energy inefficiency and thermal discomfort for occupants. Statistics provided by national energy bodies indicate that uninsulated solid walls can be responsible for as much as 35% to 40% of the total heat loss from a dwelling.
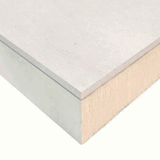
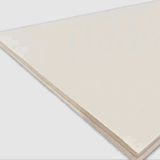
Addressing this thermal deficiency is a priority for meeting national carbon reduction targets and improving living standards. While external wall insulation is an option, it is frequently impractical due to architectural heritage restrictions, planning constraints in conservation areas, or physical limitations where a property sits directly on a boundary. Consequently, internal wall insulation (IWI) has emerged as a primary strategy for thermal retrofitting. The most efficient method for implementing IWI is the use of insulated plasterboard, also known as thermal laminate. This product provides a two-in-one solution that combines a high-performance insulating layer with a drylining surface ready for final decoration.
The adoption of insulated plasterboard significantly reduces the complexity of the installation process. Instead of installing separate layers of mineral wool, vapour barriers, and standard plasterboard, a single composite panel can be fixed directly to the wall. This not only saves time on site but also minimises the loss of internal floor space, a critical consideration in many UK homes. The technical success of these systems relies on the integration of a vapour control layer (VCL), which is usually an aluminium foil facing bonded between the insulation core and the plasterboard sheet.
Material Science of Insulated Plasterboard Cores 
To select the correct product for a specific project, one must understand the chemical and physical properties of the various insulation cores available on the UK market. These materials differ in their thermal efficiency, moisture resistance, and fire performance.
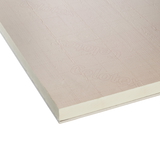
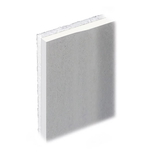
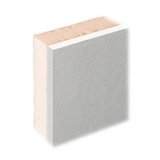
PIR Rigid Foam
PIR is the most frequently specified insulation material for domestic internal wall insulation in the UK. It is a rigid, thermoset plastic foam produced by reacting polyol and isocyanate. The manufacturing process involves a higher proportion of isocyanate compared to older Polyurethane (PUR) foams, which results in a more stable and heat-resistant molecular structure.
The foam is formed into a closed-cell structure that traps low-conductivity blowing agents within the cells. These gases have a lower thermal conductivity than air, which gives PIR its excellent insulating properties. Most PIR insulated plasterboards feature aluminium foil facings on both sides. These foil layers serve several critical functions: they act as a high-performance vapour control layer, protect the foam core from moisture, and provide a radiant heat-reflective surface that contributes to the overall thermal performance of the wall assembly. PIR typically offers a thermal conductivity of approximately 0.022 W/mK, allowing for relatively thin profiles to meet modern energy standards.
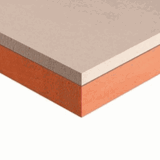
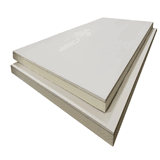
Phenolic Foam Insulation
Phenolic insulation represents the premium tier of rigid foam technology. It is manufactured from a phenolic resin that is expanded and cured into a rigid, fibre-free thermoset foam. Phenolic cores are distinguished by their exceptionally low thermal conductivity, often as low as 0.018 W/mK. This material is particularly useful in scenarios where internal space is at a premium, such as in narrow hallways or around window reveals, where every millimetre of saved space is valuable.
In addition to its thermal efficiency, phenolic foam offers superior fire performance compared to many other organic insulation materials. It has a low flame spread and emits minimal smoke when subjected to heat. Like PIR, phenolic insulated plasterboard usually incorporates an integrated vapour control layer to manage moisture movement through the building fabric.
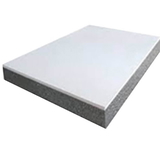
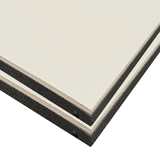
Expanded Polystyrene (EPS)![]()
EPS is a lightweight, cost-effective insulation material made from expanded beads of polystyrene. While it is frequently used in budget-conscious projects or for lining ceilings and window reveals where only a basic level of thermal improvement is required, its performance is lower than that of PIR or Phenolic foam. Standard EPS has a thermal conductivity ranging from 0.032 to 0.038 W/mK.
Because of its higher thermal conductivity, EPS-based boards must be significantly thicker than PIR or Phenolic boards to achieve the same U-value. Additionally, many basic EPS insulated plasterboards do not include an integrated vapour barrier, meaning they may not be suitable for high-risk moisture areas unless a separate vapour control layer is installed.
| Insulation Core Material | Thermal Conductivity (λ) | Primary Technical Advantage |
| Phenolic Foam | 0.018 - 0.021 W/mK | Maximum thermal efficiency for minimal thickness. |
| PIR | 0.022 W/mK | Balanced performance, cost, and moisture resistance. |
| EPS | 0.032 - 0.038 W/mK | Low cost and lightweight for basic thermal upgrades. |
| XPS (Extruded) | 0.029 - 0.031 W/mK | High compressive strength and water resistance. |
The Physics of Moisture and Vapour Control
One of the most significant risks associated with internal wall insulation is the alteration of the wall's thermal profile. When insulation is added to the interior face of a solid masonry wall, the masonry itself becomes colder during the winter because it is no longer receiving heat from the building's interior. This change creates a potential for moisture-related issues if the system is not designed correctly.
Vapour Drive and Interstitial Condensation
Internal environments in the UK generate substantial amounts of water vapour through daily activities such as bathing, cooking, and even breathing. This vapour creates a pressure that drives moisture from the warm interior towards the colder exterior. As the moisture-laden air passes through the wall materials, it cools down. If it reaches a surface where the temperature is at or below the dew point, the vapour will condense into liquid water. When this happens within the layers of the wall or at the interface between the insulation and the masonry, it is called interstitial condensation.
The consequences of unmanaged interstitial condensation include:
-
Structural damage to timber joists and wall plates through rot.
-
Reduced effectiveness of the insulation material as it becomes damp.
-
Corrosion of metal fixings.
-
Proliferation of black mould, which can severely impact the respiratory health of residents.
The Function of the Vapour Control Layer (VCL)
The vapour control layer is the primary defence against interstitial condensation. By placing an impermeable or low-permeability layer on the warm side of the insulation, the movement of water vapour into the wall structure is restricted. Aluminium foil is the preferred material for VCLs in the UK because it is highly impermeable to water vapour and durable during the construction process. In insulated plasterboard, the foil is typically integrated into the board, ensuring that the vapour barrier is automatically installed as part of the drylining process. For the VCL to be effective, it must be continuous, meaning that all joints, gaps, and service penetrations must be correctly sealed.
British Standards and Building Regulations
All wall insulation work in the United Kingdom must be performed in accordance with statutory regulations and industry codes of practice to ensure the safety and longevity of the building.
Approved Document L (Part L)
The conservation of fuel and power is governed by Approved Document L, which was updated in June 2022 with further implications for 2023. These regulations set minimum standards for the thermal performance of building elements, expressed as U-values. A U-value represents the rate of heat transfer through a specific area of a building element; the lower the U-value, the more effective the insulation.
For renovations of existing dwellings, if more than 50% of an internal wall is being drylined with insulation, the wall must be upgraded to meet a limiting U-value of 0.30 W/m²K. If it is an extension or a new build element, the target is even more stringent, often requiring a U-value of 0.18 W/m²K.
The Future Homes Standard 2025
The UK government is currently transitioning towards the Future Homes Standard, which will come into full effect in 2025. This standard aims to ensure that all new homes are zero-carbon ready. A key part of this transition is the replacement of the Standard Assessment Procedure (SAP) with a new Home Energy Model (HEM), which will place an even greater focus on fabric efficiency and the elimination of thermal bridging.
BS 5250:2021 Management of Moisture in Buildings
The revised British Standard BS 5250:2021 provides the code of practice for managing moisture risks in buildings. It acknowledges that modern construction methods and increased insulation levels have heightened the risk of condensation. The standard emphasizes the need for an integrated approach that considers heat, air, and moisture movement (HAMM). It requires designers to account for "As-Built In-Service" conditions, rather than just theoretical designs, recognising that air leakage through gaps and cracks is often a greater contributor to moisture problems than simple diffusion through materials.
| Wall Status | Target U-value (W/m²K) |
| New Build External Wall (Notional Dwelling) | 0.18 |
| New Elements in Existing Dwellings (Extensions) | 0.18 |
| Upgraded Existing Walls (Refurbishment) | 0.30 |
| Threshold for Retained Fabric (Minimum Acceptable) | 0.70 |
Determining Insulation Thickness Requirements
To reach a specific U-value, the total thermal resistance of the wall must be calculated. The resistance depends on the thickness of the insulation and its thermal conductivity.
Buy Insulated Plasterboards for Walls Now
Achieving the 0.30 W/m²K Standard
For a standard 225mm solid brick wall, reaching the refurbishment target of 0.30 W/m²K generally requires a PIR or Phenolic insulation thickness of approximately 60mm to 65mm. If using EPS, this thickness would need to increase to around 90mm to 100mm due to its higher thermal conductivity.
Space-Saving with High-Performance Cores
When space is severely limited, the advantage of phenolic foam becomes apparent. For example, a 50mm phenolic core might achieve the same result as a 65mm PIR core. While thinner boards like 22mm or 27.5mm are available, these are generally insufficient for an entire external wall but are indispensable for window reveals where there is not enough depth for a full-thickness board.
| Target U-value | Required PIR Thickness (approx.) | Required Phenolic Thickness (approx.) |
| 0.30 W/m²K | 60mm - 65mm | 50mm - 60mm |
| 0..22 W/m²K | 90mm - 100mm | 75mm - 85mm |
| 0.18 W/m²K | 120mm - 130mm | 100mm - 110mm |
The 'Dot and Dab' Installation Method (Direct Bonding)
The most common method for fixing insulated plasterboard to solid masonry walls in the UK is the 'dot and dab' technique, also known as direct bonding. This method uses gypsum-based adhesive to fix the boards directly to the brick or blockwork.
Wall Preparation and Inspection
Before any adhesive is applied, the wall must be thoroughly inspected. Any signs of rising damp or penetrating damp must be addressed at the source. If the wall is currently damp, applying insulation will only trap the moisture and lead to rapid failure of the system.
-
Cleaning: Remove any wallpaper, flaking paint, or loose plaster. The wall must be a clean masonry surface to ensure a strong bond.
-
Priming: For highly porous masonry, such as old bricks, it is necessary to prime the surface with a PVA sealer (typically a 5:1 water to PVA ratio). This prevents the masonry from drawing moisture out of the adhesive too quickly, which can lead to a weak and brittle bond.
-
Mould Treatment: Any existing mould must be removed with a specialist fungicidal wash. Do not simply cover mould with insulation, as it will continue to grow behind the boards.
Precise Adhesive Application 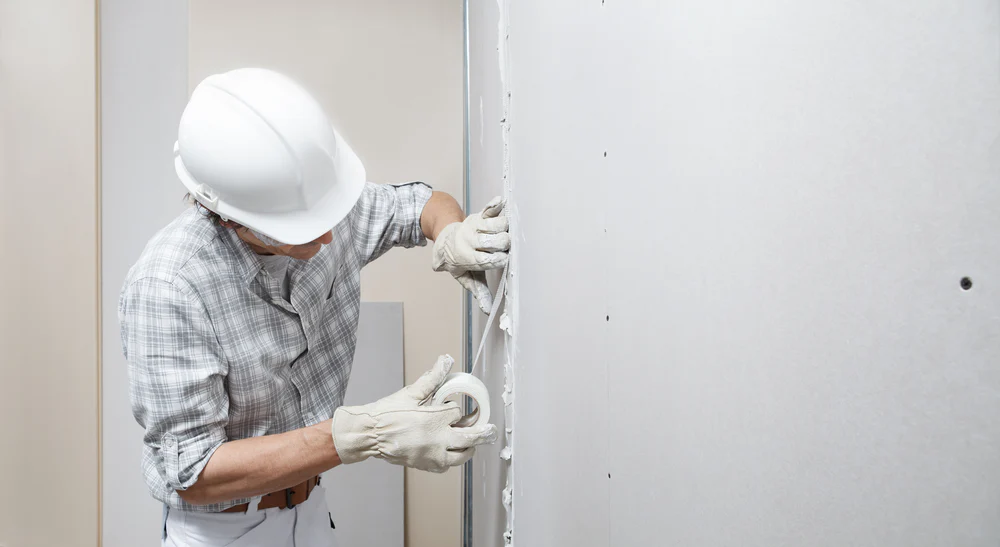
To comply with fire safety and thermal performance standards, the adhesive must not be applied in random spots. A specific pattern is required to ensure airtightness and fire protection.
-
Continuous Perimeter Ribbon: A solid, continuous ribbon of adhesive must be applied around the entire perimeter of the wall. Additionally, a continuous ribbon should be applied around all window and door openings and around any electrical socket boxes. This prevents the "chimney effect" behind the boards, where fire or smoke could spread through the void, and it also prevents thermal bypass, where cold air circulates behind the insulation and reduces its effectiveness.
-
Adhesive Dabs: The dabs should be applied in vertical rows. Each dab should be approximately 50mm to 75mm wide and 250mm long. In a standard 1200mm wide board, three vertical rows are required. The centres of the dabs should be spaced no more than 300mm apart.
-
Bottom Support: Ensure there is a ribbon of adhesive at the level where the skirting board will be fitted, but maintain a gap of approximately 10mm to 15mm between the bottom of the plasterboard and the floor to prevent rising damp from the floor entering the board.
Board Fixing and Levelling
-
Lifting and Pressing: The board should be lifted into position and pressed firmly against the dabs. It is often useful to use a plasterboard lifter or "foot-lifter" to hold the board off the ground during this stage.
-
Checking Plumb: Use a long spirit level or a feather edge to tap the board until it is perfectly vertical and flat. It is essential to check the alignment against the previous board to ensure a smooth, continuous surface.
-
Mechanical Safety Fixings: Once the adhesive has set (usually after 24 hours), it is a requirement to install at least three mechanical fixings (specialist screws with large washers) per board. These fixings must be driven through the board and at least 25mm into the masonry. These are "fire-safe" fixings that ensure the insulation stays on the wall in the event of a fire, even if the adhesive fails.
The Mechanical Fixing Method (Timber Battens)
While direct bonding is popular, mechanical fixing to timber battens is often considered a more robust solution, particularly for older walls where there may be slight moisture concerns or where a larger void is required for running services.
Constructing the Batten Framework
-
Batten Specifications: Use treated softwood battens, typically 25mm deep by 50mm wide. These must be fixed to the masonry using appropriate wall plugs and screws.
-
Damp Protection: To prevent the timber from rotting, it is best practice to install a strip of damp-proof membrane (DPM) between the timber batten and the masonry wall.
-
Grid Layout: Install battens horizontally at the ceiling and floor levels. Vertical battens should be installed at 600mm centres. This ensures that the edges of each 1200mm wide board can be screwed into a solid timber base.
-
Packing and Levelling: If the wall is uneven, use plastic packers behind the battens to ensure the framework is perfectly plumb. This is a time-consuming but necessary step to ensure the final wall is flat.
Board Installation on Battens
-
Screw Selection: The screws must be long enough to pass through the entire thickness of the insulated plasterboard and penetrate at least 22.5mm into the timber. For a 72.5mm board on a 25mm batten, this would require 100mm drywall screws.
-
Fixing Centres: Screws should be driven at 300mm intervals along the vertical battens. Avoid over-tightening the screws; the heads should be driven just flush with the surface of the plasterboard without tearing the paper.
-
Airtightness: Once the boards are fixed, the perimeter gaps at the floor and ceiling should be filled with expanding foam or a flexible sealant to maintain the airtightness of the system.
Integrating Services and Electrical Safety
A common failure in internal insulation projects occurs around electrical sockets and switches. If the vapour barrier is cut and not resealed, it creates a point where warm moist air can enter the cavity and condense on the cold wall.
Intumescent Putty Pads
To maintain the fire rating and the vapour integrity of the wall, all electrical back-boxes must be fitted with intumescent putty pads.
-
Airtightness and Vapour Seal: These pads are made from a non-setting silicone-based polymer. When moulded around the back and sides of an electrical box, they provide an airtight seal that prevents vapour from bypassing the insulation.
-
Fire Protection: In the event of a fire, the intumescent material expands to fill the void of the socket box, forming a fire-resistant char that stops flames and smoke from passing through the wall penetration.
-
Installation Procedure:
-
Ensure the power is isolated.
-
Remove the faceplate and ensure the back-box is clean.
-
Remove the backing paper from the putty pad and press it firmly into the box, ensuring it covers all sides and the back.
-
Slits should be cut only where the cables penetrate, and the putty should be pinched back around the cable to ensure a tight seal.
-
Cable Routing Considerations
When using the batten method, cables can be routed through the void created by the battens. However, care must be taken not to surround the cables with too much insulation, as this can lead to overheating. It is recommended to run cables through conduit or ensure they are appropriately rated for the installation environment.
Finishing Techniques for Insulated Plasterboard
Once the boards are fixed and the services are sealed, the wall requires a finish that is smooth and durable.
Taping and Jointing
Most insulated plasterboards come with a tapered edge, which is specifically designed for the taping and jointing process. This is often the preferred method in commercial projects and for modern residential retrofits because it introduces less moisture into the building than wet plastering.
-
Bedding: Apply a layer of jointing compound to the taper and press the joint tape into it.
-
Filling: Once dry, apply a second "fill" coat over the tape, feathering the edges outwards.
-
Finishing: Apply a final thin coat and sand it smooth with fine-grit sandpaper. This creates a surface that is flush with the rest of the board and ready for painting.
Skimming with Gypsum Plaster
For a more traditional finish, the entire wall can be skimmed with a 2mm to 3mm layer of finishing plaster.
-
Bonding: If the boards have been handled or have become dusty, a coat of PVA or a bonding agent may be required to ensure the plaster adheres correctly.
-
Beading: External corners should be reinforced with galvanised steel or plastic corner beads, which are bedded in plaster before the final skim is applied.
Final Decoration
-
Mist Coat: New plaster is highly absorbent. The first coat of paint should be a "mist coat"—a mixture of standard emulsion paint diluted with water. This seals the plaster and provides a key for subsequent full-strength coats.
-
Breathable Paint: If the property is an older building where a breathable strategy is being used (for instance, with wood fibre insulation instead of PIR), it is vital to use breathable paints such as silicate or clay-based paints. However, when using foil-backed insulated plasterboard, the vapour barrier is already present, so standard emulsion is typically appropriate.
Special Considerations for Window Reveals and Thermal Bridges
Thermal bridging occurs when a highly conductive material creates a path for heat to bypass the insulation. This is most common where the wall meets the floor, the ceiling, or window frames.
Window Reveal Strategies
Window reveals often lack the depth to accommodate a 62.5mm or 72.5mm board. If left uninsulated, these areas will become cold spots that attract condensation and mould.
-
Ultra-Thin Boards: Use specialised ultra-thin PIR or phenolic boards (e.g., 22mm or 27.5mm) specifically for reveals. While these do not meet the 0.30 U-value target on their own, they significantly reduce the thermal bridge and prevent mould growth at the junction of the window and the wall.
-
Angle Beads: Ensure that corner beads are used on all reveal edges to protect the boards from impact and to provide a clean line for the plasterer.
Continuity of Insulation
The insulation must be continuous. At the eaves, the wall insulation should ideally meet the loft insulation. Any gaps in the insulation layer allow heat to escape and provide a place for condensation to form out of sight, leading to rot in the roof timbers over time.
Environmental and Economic Impact 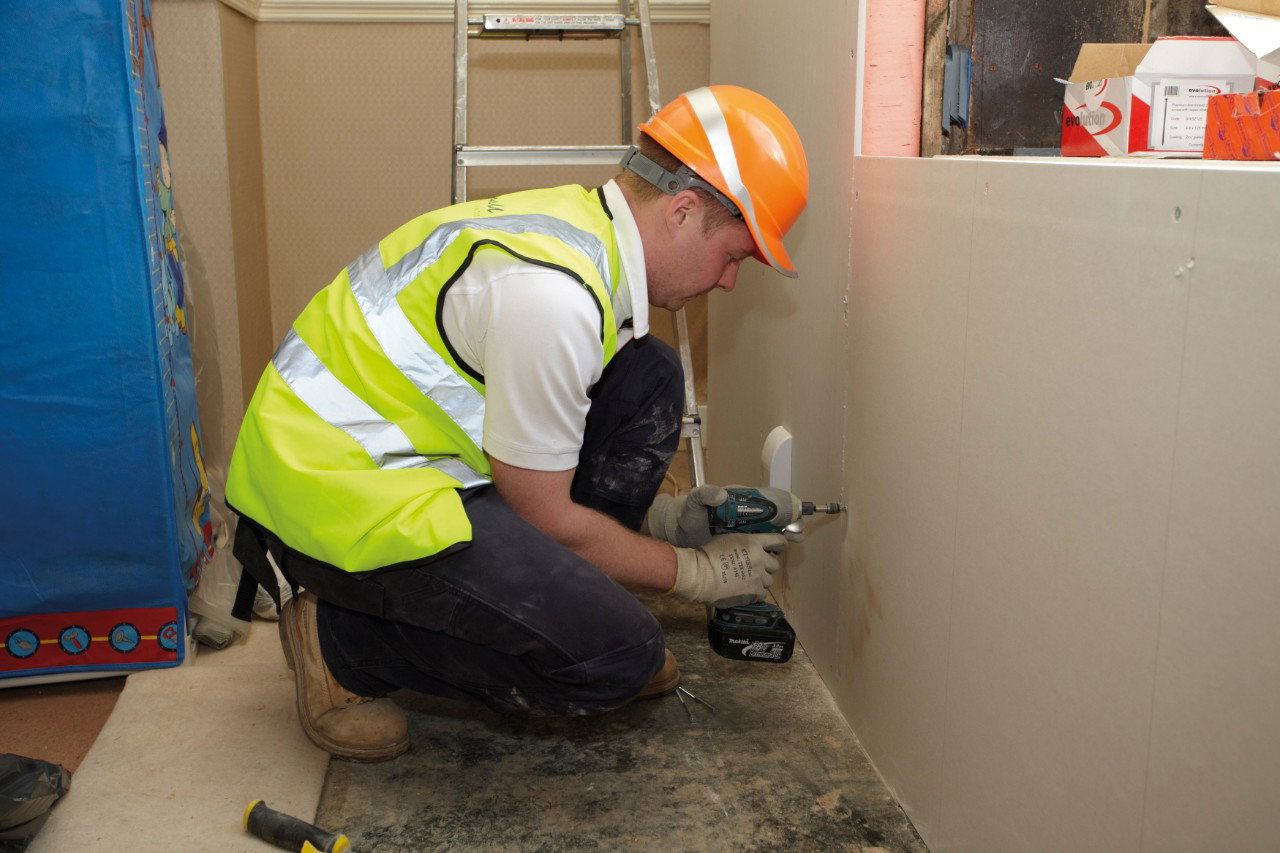
Investing in internal wall insulation with vapour barrier insulated plasterboard provides substantial long-term benefits for both the homeowner and the environment.
Energy Savings and Carbon Reduction
By reducing heat loss through the walls by up to 90%, the demand on the heating system is significantly lowered. In a typical UK semi-detached home, this can translate to annual savings of several hundred pounds on energy bills. From an environmental perspective, the reduction in gas or electricity consumption directly lowers the property's carbon footprint, contributing to the UK's net-zero targets.
Durability and Lifecycle
Rigid foam insulation boards such as PIR and phenolic are highly durable. They are resistant to sagging and maintain their thermal performance for the life of the building (estimated at 50 years or more), provided the building fabric is maintained and kept dry. Unlike some loose-fill materials, rigid boards do not settle over time, ensuring that there are no cold spots created at the top of the wall.
Summary of Best Practices for Professionals
To ensure a high-quality installation that complies with all UK regulations and provides long-term thermal comfort, the following principles should be observed:
-
Conduct a Robust Assessment: Before starting, perform a moisture risk assessment. For complex retrofits, this should be done in accordance with PAS 2035, the UK's standard for energy efficiency retrofitting.
-
Prioritise Airtightness: The vapour barrier is only as good as its weakest point. Use continuous adhesive ribbons and seal all service penetrations with putty pads and specialist tapes.
-
Maintain Fire Safety: Never omit the mechanical fire-safe fixings. Even in direct bonding, these are critical for life safety in the event of a fire.
-
Focus on Detail: Address window reveals and junctions with the floor and ceiling with the same care as the main wall areas to eliminate thermal bridges.
-
Manage External Maintenance: Ensure that the external masonry is well-maintained. Insulation is not a substitute for a sound, weather-tight building envelope.
The use of vapour barrier insulated plasterboard is a technically sophisticated and highly effective way to modernise the UK's housing stock. By understanding the material properties and strictly following installation protocols, property owners can transform cold, damp-prone rooms into warm, healthy, and energy-efficient living spaces.
UK Legal Disclaimer
The information provided in this guide is for general informational purposes only and does not constitute professional advice or a formal material specification. Internal wall insulation is a complex process that can significantly alter the moisture dynamics of a building. All thermal retrofitting projects should be assessed by a qualified professional (such as a RICS surveyor, architect, or PAS 2035 retrofit coordinator) prior to commencement. All work must comply with the current UK Building Regulations (Approved Document L, B, and others) and be inspected by Local Authority Building Control or an Approved Inspector. The specific thickness and type of material required will vary depending on the individual property's construction, location, and existing thermal profile. No liability is accepted for any loss, damage, or injury resulting from the use of this content. All advice should be thoroughly checked against manufacturer-specific guidelines and site-specific requirements.

Samuel Hitch
Managing Director
Buy Insulation Online.
Leave A Reply
Your feedback is greatly appreciated, please comment on our content below. Your email address will not be published. Required fields are marked *